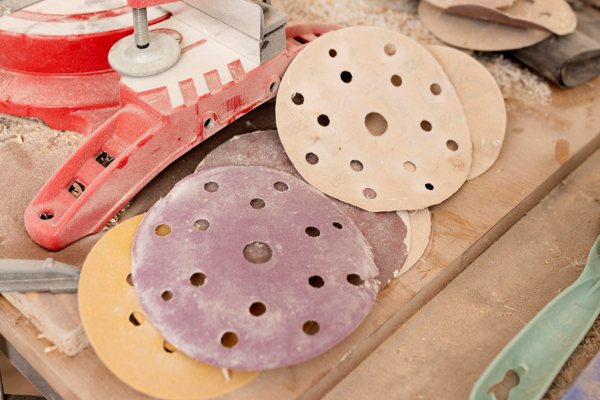
The Role of Sanding in Epoxy Work
Sanding is one of the most underappreciated but essential parts of an epoxy project. Whether it's needed to correct surface imperfections, prepare the surface for a topcoat, or achieve a desired matte or textured finish, sanding serves both functional and artistic purposes.
The focus of this guide will be on explaining:
- What sanding epoxy does.
- When it's appropriate or necessary.
- And the techniques to use based on your project goals.
We'll also talk about the importance of using quality epoxy and answer common questions that arise during sanding-related phases of epoxy work.
What Sanding Does for Epoxy Surfaces
Sanding epoxy is the process of gently abrading the cured surface with abrasive material—typically sandpaper—to either remove flaws or prepare it for the next step. Doing this creates micro-scratches that help new layers of epoxy or sealant adhere properly and evenly. When done for aesthetic reasons, it can reduce surface gloss or even produce a fully matte finish.
For uneven pours, sanding helps level out high spots, remove nibs or bubbles, and prepare edges for trimming or beveling. It’s especially important when working in layers or combining epoxy with other materials.
When Sanding Is Necessary or Beneficial
There are several situations in which sanding is either required or recommended:
#1: Between Applying Epoxy Layers
When applying a second coat after more than 10 hours, sanding ensures proper mechanical adhesion, allowing new epoxy to seep into tiny scratches and form a stronger bond to the previous layer. Without it, layers may delaminate over time.
#2: To Correct Imperfections
If your cured epoxy has dust nibs, bubbles, or raised edges, sanding is an effective way to even out the surface before finishing.
#3: For Achieving a Matte or Satin Finish
Some people prefer a non-glossy look. Controlled sanding followed by buffing can achieve this aesthetic.
#4: When Embedding Objects Mid-Layer
Light sanding helps epoxy layers grip embedded objects more securely if you're working in stages.
#5: Polishing Prep
Sanding is a required step before polishing, especially for projects aiming for a mirror-like sheen.
Step-by-Step: How to Sand Epoxy Effectively
Tools and Supplies
-
Sanding pads or sandpaper (various grits): Coarse grits (60–120) for leveling; medium grits (220–400) for smoothing; fine grits (800–3000+) for polishing prep.
-
Orbital sander or sanding block: Orbital sanders speed up the process on flat surfaces, while sanding blocks give more control on curved areas.
-
Water spray bottle: For wet sanding, which reduces dust and improves clarity.
-
Respirator and protective eyewear: Especially important if dry sanding epoxy, as dust can be harmful.
-
Microfiber cloths: For wiping away debris between sanding stages.
- Isopropyl alcohol and lint-free cloths: Used to clean the sanded surface after sanding.

Epoxy Sanding Techniques
Sanding Between Epoxy Layers
When applying multiple coats of epoxy, sanding between layers may be necessary depending on timing.
Why It Matters
Sanding between layers improves adhesion by providing a mechanical grip if the chemical bonding window has closed. This ensures the new layer fuses with the previous one rather than delaminating.
Note that it is possible to apply additional layers of epoxy without sanding if done within 4 to 6 hours after the previous layer. Beyond that, it's best to wait until at least 10 hours have passed, then sand the surface gently, clean it, and apply the next coating.
Technique
-
Wait Until Fully Cured: Allow the previous epoxy layer to cure for at least 10 hours. It doesn't have to be fully cured, but it should feel firm to touch.
-
Use 220–320 Grit Sandpaper: Lightly sand the surface to create a fine abrasion. Avoid sanding too aggressively—just enough to dull the gloss and give the new coat something to grip.
-
Avoid Buffing or Polishing: Buffing between coats can seal the surface, preventing proper adhesion.
-
Clean Thoroughly: Wipe down with isopropyl alcohol and a lint-free cloth to remove sanding dust and residue before pouring the next layer.
Note: If you're still within the recoat window (usually 4 to 6 hours for UltraClear products), sanding may not be required, but a clean, dust-free surface is still essential.

Sanding Techniques for Cured Epoxy
For cured epoxy, you can use this three-stage sanding method to get your surface to a desired place.
Simply start at technique #1, then continue until your finish is where it needs to be for your current goal.
Stage #1: Light Dry Sanding (General Surface Prep)
-
Start with a lower grit. If leveling a surface, begin with 120- or 220-grit sandpaper. Sand in a circular or cross-hatch motion.
-
Choose the right tool. Use a sanding block or orbital sander with even, overlapping strokes.
-
Clean between grits. Use a microfiber cloth or damp rag to wipe away dust before moving to the next finer grit. We also suggest wiping clean with isopropyl alcohol before applying any new epoxy or topcoat.
Stage #2: Wet Sanding (For Finishing)
-
Start with coarse paper. Begin sanding with 600-grit wet/dry sandpaper.
- Apply water to the surface. Mist the epoxy surface with a spray bottle.
- Sand in circles. Use a sanding block or orbital sander and apply light pressure, rinsing often, rinsing the surface and sandpaper often.
-
Proceed to higher grits. Performing additional sanding passes with progressively higher grits. We suggest 800 to 1200, but you can go up to 2000 if desired for an even smoother finish. For the final grit, perform 2 or 3 passes.
-
Wipe it down after each pass. Clean thoroughly before polishing or sealing.
-
Dry and wipe. After sanding, dry the surface completely and inspect under good lighting.
Stage #3: Sanding for Matte Finish
-
Sand. To achieve a matte finish, sand with 1200- to 2000-grit paper to reduce gloss.
-
Repeat with the same patterns. Sand with the same motions consistently to prevent uneven textures as you perform each pass.
-
Finish by cleaning. Clean and dry the surface completely.

Why Quality Epoxy Matters When Sanding
When working with epoxy, the product quality greatly affects how easily and effectively it sands. Budget-brand epoxies—particularly those imported from overseas with unclear formulation standards—often cure inconsistently, producing soft or gummy areas that clog sandpaper or peel under friction. These defects make sanding unpredictable and frustrating.
Inconsistent formulas can also create cured surfaces that are either too brittle or too rubbery, both of which reduce control during sanding. Poor chemical composition can also introduce safety risks through unknown additives or low-grade hardeners.
Learn more about the importance of choosing good epoxy here.
Why UltraClear Epoxy is the Better Choice
With UltraClear Epoxy products, you’re getting a high-purity, U.S.-manufactured formula designed to cure evenly, resist yellowing, and handle abrasion effectively. Whether you're using:
-
UltraClear Bar & Table Top Epoxy for protective glossy finishes,
-
UltraClear Deep Pour Epoxy for thicker projects like river tables or trays,
-
UltraClear Art & Craft Epoxy for creative, small-scale pieces.
With our high-grade UltraClear Epoxy, you’ll benefit from easy sanding, less dust, and a better surface finish that requires minimal touch-up.

FAQs: Common Questions About Sanding Epoxy
Do I have to sand between epoxy coats?
It depends on how much time has passed since the previous coat was mixed and applied. The ideal application period is 4 to 6 hours after the most recent layer. No sanding is necessary during that timeframe.
However, if the surface has cured for more than 4 to 6 hours, you'll need to wait until at least 10 hours have passed, then sand the partially or fully hardened surface before applying a new layer.
Sanding a partially hardened epoxy layer enables the next layer to bond securely by giving it a physical grip.
Can I sand epoxy before it fully cures?
Yes, gently. Wait at least 10 hours minimum before attempting to, as the epoxy will otherwise be too soft.
Sanding uncured or partially cured epoxy can result in a smeared, uneven surface and potentially compromise the final finish, so inexperienced users may instead prefer to let it fully cure before proceeding.
What’s the difference between wet sanding and dry sanding?
Wet sanding and dry sanding are two distinct methods used in epoxy work, each suited to different purposes and results.
Dry Sanding
- Dry sanding is typically used for rough shaping, leveling uneven surfaces, or preparing epoxy for an additional coat. It involves using sandpaper without any water, and it’s ideal for quickly removing material or dulling a surface to create a mechanical bond between layers.
- However, dry sanding produces a significant amount of fine dust, which can be messy and requires protective gear like a dust mask or respirator. It also generates more friction and heat, which can clog sandpaper or affect the surface if you're not careful.
Wet Sanding
- Wet sanding, by contrast, uses water as a lubricant and cooling agent. This method is better suited for fine finishing work, such as smoothing the final cured surface before polishing. It reduces airborne dust and minimizes heat buildup, making it a cleaner, safer process.
- Wet sanding also helps produce an ultra-smooth surface, especially when working with high-grit sandpaper (600 to 3000 grit). It’s commonly used when preparing an epoxy surface for polishing or achieving a satin or matte finish.
In short, use dry sanding for shaping and prepping between coats, and use wet sanding for final smoothing and aesthetic refinement.
How do I avoid swirl marks when sanding?
Use a sanding block or orbital sander with overlapping motions, and be sure to clean thoroughly between grit levels. Finish with a high grit for a uniform appearance.
Can I achieve a matte finish on my epoxy through sanding?
Yes. After sanding with progressively finer grits (ending around 1000–1500), you can leave the surface unpolished to retain a satin or matte texture.
Have Questions? Want Advice? We're Here to Help!
If you have any questions about sanding epoxy resin, or if you'd like assistance in planning an epoxy project, please reach out to us at UltraClear Epoxy—our epoxy experts are ready to assist!
You can contact us via phone or email here. During business hours, you can also text chat online with one of our resin specialists by clicking the Help button at the bottom of your screen.
In our online store, you'll find a variety of useful tools and supplies, ideal for resin projects, plus our award-winning UltraClear Bar & Table Top Epoxy and our UltraClear Deep Pour Epoxy.
UltraClear Epoxy—Trusted by over 1 Million+ Happy Customers


