When you're planning an epoxy project, it's important to determine how much resin you'll need to complete your project.
Coming up short after having already started the process can be a real headache, particularly given the relatively small window of time where each mixed epoxy batch can still bond with additional batches (though there are always methods you can use if your epoxy has already cured).
On the other hand, you don't want to buy too much, either. There's no sense in having way more than you'll need.
In this article, we explain which aspects to keep in mind when calculating your total epoxy requirements. Then, we'll go over how to measure the resin batches themselves.

Step #1: Planning your epoxy project
Since you'll first need to acquire some epoxy, let's go over how to determine the amount you'll need.
Before we begin, you should take a look at our UltraClear Epoxy coverage calculator. This excellent tool can help you quickly estimate how many gallons of epoxy resin you should purchase in order to complete your project, with a bit of leeway for potential mistakes.
If you're planning a deep pour epoxy project, you can use the UltraClear Epoxy deep pour coverage calculator to get information for that resin type.

The aspects that affect how much you'll need
There are several things to take into account when measuring for epoxy resin:
-
Surface area - You'll need to measure your surface area. If the shape is relatively simple, then this should be pretty easy.
If you're working with something complex, it may take more time to be accurate. If you're short on time, though, you can just round upward to play it safe and attain a quick estimate. -
Desired layer thickness - You need to determine how thick of a layer you want your epoxy finish to be after it has fully cured.
Our UltraClear Table Top Epoxy self-levels at 1/8 of an inch, and this is generally ideal for typical epoxy projects.
Occasionally, though, a project will call for something thicker (e.g., if the user is embedding thin objects like bottle caps), so you might need a larger 1/4 inch-thick layer. If that's you, keep that in mind when making your calculations.
Note: For thick layers beyond 1/4 of an inch, you'll want to use our UltraClear Deep Pour Epoxy. This epoxy is designed to be poured in large singular batches to fill deeper crevices and gaps, as well as for embedding objects within your epoxy layers.
If you do intend to use deep pour epoxy but you expect your project to see a lot of use or traffic, it is recommended that you give it a final topcoat of the table top epoxy nonetheless, as the table top epoxy has the highest resilience and impact resistance. -
Rails, dams, or free-flowing - If you're using rails, raised edges, or a temporary dam to contain the epoxy resin as you pour, you won't need quite as much.
This may not affect the total tremendously, but for bigger projects it can change the amount you'll need to purchase.
Just keep in mind that table top epoxy is viscous, cohesive, and self-leveling, so it doesn't usually require rails unless you'll be using deep pour epoxy as well. -
Skipping the seal coat - We recommend that almost every project involve an initial seal coat of epoxy; some may need two coats.
This will prevent air bubbles and certain blemishes from becoming a major problem during the pouring and curing phases.
However, if you're certain the substrate you're working with won't need it, it is possible to skip the seal coat, which will save you some (not a lot) of epoxy. This, in addition to other factors may be enough to lower the total you need.
Just be absolutely sure you don't need one; it's better to err on the side of caution if you don't know.


Calculating your total
Once you've accounted for each of these factors, you can use the epoxy calculator to input this information and get a safe estimate of how much epoxy you should have at hand.
One gallon of table top epoxy can cover up to 16 square feet of flat surface area with a flood coat. This does not include the seal coat, which needs to be accounted for separately.
For seal coating, a gallon of table top epoxy can cover up to 48 square feet.
Always play it safe by gathering a little more than your estimate suggests, unless you already have experience with this type of project and know how to measure with accuracy to avoid mistakes.
When shopping for epoxy, be wary of subpar products.
Determining how much epoxy you need for a project is one of the final steps in project planning. Getting the numbers right can save you time and money.
It's also important to use good-quality epoxy resin. There are many resin dealers who use deceptive marketing to sell low-quality epoxy. These resins often have a low upfront cost, but can fail to hold up long-term or even cure properly in the first place.
Our free ebook, The Ugly Truth About Epoxy Resin: What Companies Don't Want You to Know, shares details on dishonest practices that are surprisingly common in the epoxy industry. Through this book, we hope to inform you on how to sort through the mess and find the right resin for your projects.

Step #2: Measuring your batches
Once you've prepared your workspace and the project substrate, you'll be ready to apply your epoxy layers.
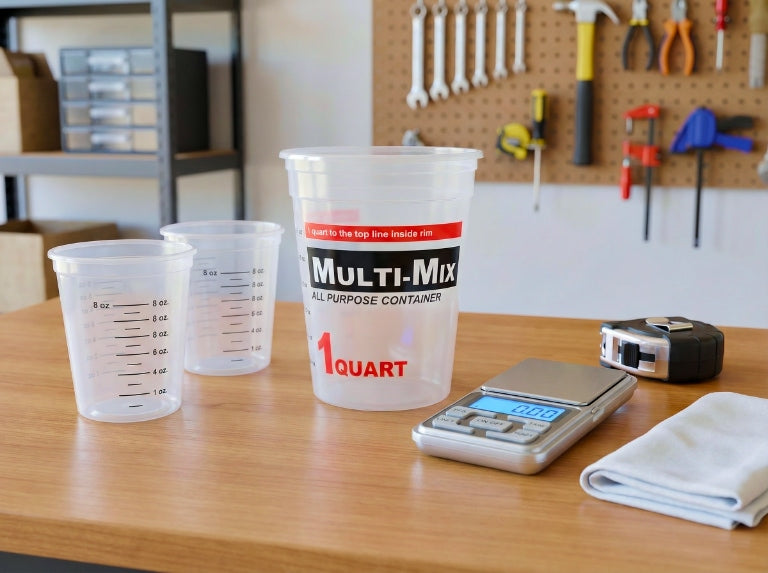
We strongly recommend you plan ahead by purchasing some graduated measuring containers which list the volume on the side.
Since most epoxy resins are two-part epoxies which, meaning they come in two components that must be mixed together in a specific ratio, these containers will enable you to be precise in how much of either component you add to the batch.
You'll need one container for each batch you mix up, as they can't be reused without risks.
For seal coats, which are applied in smaller batches, one-quart containers are usually best.
-
Mixing a seal coat: Mixing and measuring a seal coat is pretty straightforward.
We typically suggest that each batch be no more than 32 ounces combined. That would be 16 oz of hardener and 16 oz of resin, poured into a container and thoroughly mixed for a few minutes, then painting the epoxy onto the surface using a clean, tight paintbrush to seal the substrate. -
Mixing a flood coat: For the flood coat, you can mix a batch of up to one gallon combined at a time. That's 64 oz of hardener and 64 oz of resin.
Mix it thoroughly—we recommend using a mixing drill bit for a full gallon batch, as it's capable of blending large amounts effectively in just a few minutes.
With UltraClear Epoxy, you'll receive detailed mixing instructions with your epoxy order, and you can always view digital instructions for our UltraClear Table Top Epoxy from our support website to read and understand the whole process.
Note: Deep pour epoxy is not used for flood coats. If you need them, you can find the deep pour epoxy instructions here.
Click here to learn how to avoid some of the most common mixing and pouring mistakes.

Have Questions? Want Advice? We're Here to Help!
If you have any questions about epoxy resin, or if you'd like assistance in planning an epoxy project, please reach out to us at UltraClear Epoxy—our epoxy experts are ready to assist!
You can contact us via phone or email here. During business hours, you can also text chat online with one of our resin specialists by clicking the Help button at the bottom of your screen.
In our online store, you'll find a variety of useful tools and supplies, ideal for resin projects, plus our award-winning UltraClear Bar & Table Top Epoxy and our UltraClear Deep Pour Epoxy.
UltraClear Epoxy—Trusted by over 1 Million+ Happy Customers


