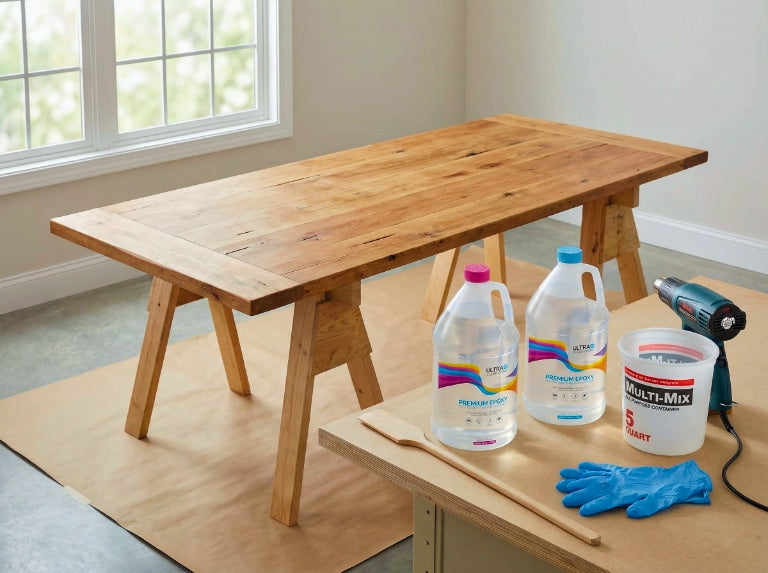
Welcome to our briefing on pouring epoxy resin!
The pouring step is a subtle phase of the resin crafting process that seems simple yet is often a factor for whether various imperfections will show up in an epoxy finish.
Many times we've seen resin users without proper form end up with unseemly blemishes such as air bubbles, divots, "icicles", and more in their finish. Often, they are unable to understand exactly why it happened.
For instance, a clumsy pour can draw in a lot more air bubbles than you'd otherwise have. While air bubbles are typically removed shortly after a proper pour, a bad pour can pull in so many that, despite your best efforts, some remain.
Rather that trying to fix these problems after the fact, we find it's much easier to simply prevent them entirely.

How to pour resin: Five tips for beginners
The first thing to remember is that every step in the process has a proper technique.
If you're not already familiar with best mixing practice, make sure you understand that first. Good pouring form won't matter if the resin itself is clumpy or incorrectly measured. Good brands of epoxy will include a detailed set of instructions on how to do this.
For UltraClear customers, our support site also has digital versions of both our UltraClear Table Top Epoxy and our Deep Pour Epoxy which you can read online or download and print out.
Here's a quick list of the tips included in our guide:
- Tip 1: Pour slowly and keep it close to the surface.
- Tip 2: When pouring, squeeze the container to tighten the flow.
- Tip 3: Move smoothly across the surface as you pour.
- Tip 4: Don't scrape out residual resin when pouring.
- Tip 5: Pour multiple layers as needed to avoid air bubbles.
For each tip, we'll go into more detail below.


Tip #1: Pour slowly and keep it close to the surface.
When you start pouring, take your time and keep the mixing container relatively close to the surface.
For bigger projects like a countertop or table top, pour from several inches above the substrate.
Note: If you are doing a larger project, you'll probably need a seal coat first. Make sure you understand the purpose of seal coats and determine whether your project needs one.
For tiny projects such as resin jewelry or coasters, pour just a couple inches (or less) away from the surface (e.g., the inside of a silicone mold).
This will keep the resin flowing in a smooth, consistent stream and pull in less air.
Tip #2: When pouring, squeeze the container to tighten the flow.
By squeezing the mixing container a bit, you force the resin to flow in a tighter stream. This is useful for getting it into small spaces without spreading it elsewhere unintentionally.
Since containers should never be reused, it doesn't matter if they get a little bent out of shape after you've already blended your two-part epoxy mix.

Tip #3: Move smoothly across the surface as you pour.
Even though epoxy is self-leveling, you can make the process faster and smoother by moving your container slowly and deliberately as you pour your resin.
Doing this helps to fill the space faster and allows you to identify gaps more quickly so you can prevent divots from forming. If you find out you've come up a bit short, you can quickly mix up a small batch to fill out the first coat before it begins to cure.

Tip #4: Don't scrape out residual resin when pouring.
You should avoid scraping residual resin from the container as you pour.
This is because whatever is left behind is likely insufficiently mixed and will be unable to properly cure. When blending up your batch prior to pouring, it's easy to miss some spots on the sides and bottom of your container, so make sure you always mix thoroughly, whether solely by hand or with the aid of an electric drill.
With big gallon-sized batches, we recommend using an electric drill with a suitable mixing bit alongside intermittent manual mixing to scrape the sides and bottom where a drill bit might miss. This is the best way to ensure a smooth blend.
Tip #5: Pour multiple layers as needed to avoid air bubbles.
Epoxy resin is self-leveling. This means it will spread out on its own until it settles in its natural thickness. Pouring a single layer thicker than that can cause substantial air bubbles to form.
Instead, you can avoid excessive air bubbles by pouring multiple layers, separated by a brief period of partial curing.

For example, a high quality table top epoxy (such as our own premium resin) will self-level at 1/8 of an inch. So if you want a 1/4 inch coat of table top epoxy on your substrate, e.g., a wooden table, you should do multiple layers.
Here's how:
- Begin by pouring one layer as normal. The epoxy will self-level, so you just need to make sure there's enough to coat the intended surface.
- Remove air bubbles using your heating tool (a heat gun or propane torch). Consult your instructions on how to do this. You can wait a few minutes after the first pass, then do another to make sure they're removed.
- Wait 4 to 6 hours for this layer to partially cure.
- Repeat the process to add a second layer. Even though both layers will be at different points in the curing process, the epoxy will mesh seamlessly, and it will be as if you had one singular layer but without the air bubbles that come from doing it all in one large pour.
Note: While this is effective for doing a double-layered finish of table top epoxy, for deep finishes greater than 3/8 of an inch, you should instead use a deep pour epoxy.
Our UltraClear Deep Pour Epoxy supports individual layers of up to 2 inches in one coat.

Additional Resources
A couple related articles you may find useful:
- Epoxy for beginners: The three types of epoxy coating - An article explaining the three common epoxy coating methods.
- Epoxy resin drying/curing times - Our briefing on how quickly epoxy cures and what can negatively affect curing.

Have questions? Want advice? Contact us!
If you have any questions or concerns about:
- How to pour epoxy resin
- Epoxy project planning
- Any other resin-related topics
Please reach out to us at UltraClear Epoxy. Our resin experts are ready to assist.
You can contact us via phone or email here. During business hours, you can also text chat online with one of our epoxy specialists by clicking the Help button at the bottom right of your screen.
UltraClear Epoxy—Trusted by over 1 Million+ Happy Customers


