Most mid-size epoxy projects involve pouring epoxy onto a bondable surface material, called a substrate. Because epoxy bonds so effectively, there are numerous materials that can make an adequate substrate.
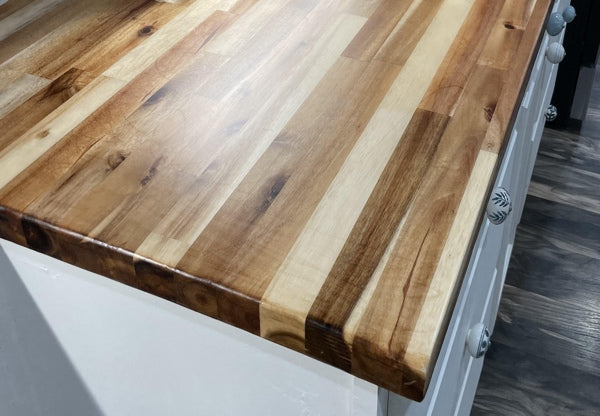
Some materials make a naturally great substrate. For example, wood is both one of the easiest materials for epoxy to bond to as well as the most common category of substrate, with many different types of softwood and hardwood being used in epoxy projects around the world.
Other effective materials include granite, most metals, ceramic, concrete, marble, and much more.
However, when epoxy does bond with another material, it first settles into any tiny grooves and pores present within the material.
For this reason, we always recommend applying a seal coat to the substrate before you start pouring directly onto the surface.
Below, we explain in detail what seal coats are and why they're essential for achieving a strong, clear finish for your epoxy project.
Afterward, we provide a step-by-step guide to applying a seal coat to your substrate.
What is an epoxy seal coat?
A seal coat is a very thin layer of epoxy that has been applied by hand—typically with a paint brush—to a clean substrate to prepare it for the epoxy pouring step.
They're typically applied using a table top epoxy—such as our UltraClear Table Top Epoxy—as its higher viscosity lends performs well in sealing porous, uneven surfaces.
Ultimately, though, most similar epoxies should work just fine for seal coat applications.
Can I use deep pour epoxy for my seal coat?
You can, though we don't recommend using deep pour epoxy for this step, because it is thinner and takes longer to cure.
The thickness of table top epoxy when applied as a seal coat allows it to maintain its position even when applied to the sides of a substrate, instead of sliding downward.

Why is a seal coat so important?
Many materials used as a substrate for epoxy are porous. Sometimes these pores are easy to see, but often they are too small.
Still, their presence is a concern because each pore can hold a tiny amount of air or moisture that will diminish the epoxy resin's ability to bond firmly with the substrate.
When an epoxy seal coat is applied, it seeps into these surface-level pores of the substrate, releasing or trapping the air within.
This prevents it from interfering with the bonding process of your flood coat or deep pour coat. It also greatly reduces the amount of air bubbles that form.
When you later pour on a proper coat, you'll get the strong, resilient bond that epoxy is known for.
Is one seal coat enough?
For most cases, a single seal coat will be sufficient.
If you have an obviously porous wood, or if you're simply not sure, you can apply a second and even a third final seal coat, four hours after each previous one.
After my seal coat, when should I pour my flood coat or deep pour coat?
The seal coat will begin to cure several minutes after you've mixed it. For the next twelve hours it will become tacky, a phase it enters as it continues to harden.
We recommend mixing and pouring your flood or deep pour coat four hours after you apply your seal coats. The epoxy will mesh nicely with the stickiness of the seal coat at that point.
What if I forgot the seal coat and have already poured my epoxy?
If you've poured your epoxy without a seal coat, you may end up with numerous tiny air bubbles being released from the substrate.
Because flood coats are thicker than seal coats, some of these air bubbles won't reach the surface to pop and will get stuck within the epoxy.
A very porous substrate can even absorb some of the epoxy after you finish pouring, leaving your coat uneven in different locations.
However, these air bubbles can be removed.
How do I remove air bubbles from the epoxy?
To remove air bubbles, you'll need a heat gun or propane torch.
You can use one of these to make them burst. The air will then leave the epoxy, and if done soon enough (within 15-20 minutes of pouring), the epoxy should continue to self-level into a smooth coat like normal.
Propane torches are more effective at this, but require a bit more care and precision.
If you use a propane torch to remove bubbles, you must keep the flame at a distance and keep it moving constantly. Don't let the flame touch the epoxy at all, and don't hold it over any particular spot for more than a full second, as this is the point at which it may cause heat damage to the epoxy.
Learn more about removing air bubbles here.
The brush I used left behind stroke marks. What can I do?
This is normal.
Once you've applied your flood coat or deep pour coat, the brush strokes will vanish as the new epoxy meshes with the seal coat to essentially become one thick layer. Any stroke marks will be gone.
As long as you follow the instructions that are intended for your brand of epoxy, it should result in a transparent glasslike finish.
However, we can only guarantee the quality of our own UltraClear Epoxy resins. If you're using our UltraClear Table Top Epoxy, you can find a digital version of the included instructions on our support site.

What supplies do I need to apply a seal coat?
Aside from the epoxy itself, you'll need the following for your seal coat:
-
Stir sticks - These are necessary for mixing small batches of epoxy.
We recommend mixing batches of 32 oz total (or less as needed) for your seal coat, so that you have enough time to apply the mixed resin before it starts to harden.
You can mix additional batches afterward as needed until your seal coat is complete.
In our store, we offer the excellent Poly Pro Stir Sticks. -
A mixing container - For each seal coat, you'll need a clean container to mix your epoxy components in.
We suggest quart-sized containers with measurement lines, so you can accurately add the exact amount of each component into the mix. For example, our UltraClear Table Top Epoxy has a 1:1 mixture, so to create 32 oz of epoxy, you'd mix 16 oz of the resin component with 16 oz of the hardener.
The one-quart containers in our store are great for this purpose. -
A paint brush - Use a new or clean brush that won't lose bristles as you apply the epoxy. Lost bristles can become stuck in the epoxy and may be difficult to remove if not noticed in time.
In our store, we offer paint brushes that work very well with epoxy.
You can find all of these supplies and more on our website, as well as at most home improvement stores.
Our step-by-step guide to applying a seal coat
As with any epoxy project, make sure you have all the necessary supplies and a suitable working environment before you begin.
When you're ready, follow the steps below:
Step #1: Measure the epoxy.
You'll start by adding your epoxy resin component into your mixing container, then add your hardener component.
The amount you need may vary by project size, but usually 32 oz total is more than enough.
If you feel like you'll need more time, start with a smaller batch. You can always mix more after brushing until your entire substrate is sealed.
Note: Be sure to use a clean container for each new batch.
Our table top epoxy uses a 1:1 ratio, so a 32 oz measurement would be 16 oz of resin and 16 oz of hardener.
For a seal coat, don't mix more than 32 oz total at a time. If you'll need more than 32 oz, you should mix the extra amount as a second batch immediately after you finish brushing on the first batch.
Step #2: Mix the epoxy.
Use your stir sticks to mix the components thoroughly, being sure to scrape the sides and bottom so that everything is blended well.
Mix it for a total of two to three minutes.
Note: After you finish mixing, it's possible that a small amount of unblended epoxy will stick to the sides; this is common and not a cause for concern.
Don't attempt to scrape off or use that sticky residue, as it is just remnants of components that weren't fully mixed and won't cure properly.
Step #3: Apply the seal coat.
Immediately begin brushing your epoxy mix onto the surface of your substrate.
Make sure to cover any nooks or grooves that may be present, such as on objects with unconventional or rougher shapes.
Step #4: Wait four hours.
After you finish brushing on the seal coat, you'll need to wait four hours for it to partially cure.
The seal coat will become tacky and be ready for either a second seal coat, your flood coat, or your deep pour coat if you're also using deep pour epoxy.
After that, you're done. Depending on your project, the next step will be pouring a flood coat or deep pour coat.

Additional Resources
Here's a small list of additional resources you may find useful:
- Epoxy: Proper storage, shelf life, and preventing "yellowing" - Our guide to storing unopened and opened epoxy bottles, as well as how to prevent surface yellowing.
- Guidelines for cleaning epoxy surfaces - Advice on how to clean your epoxy surfaces after they've cured.
- How to wash away resin and epoxy on your hands and skin - Methods for cleaning resin off of your skin—It's easier than you might expect!
Have questions? Want advice? Contact us!
Epoxy projects can be a big undertaking, so it's not unusual to have concerns.
If you have any questions epoxy resin or related topics, or if you'd like project planning assistance, please reach out to us. Our epoxy experts are ready to help!
You can contact us via phone or email here.
During business hours, you can also text chat online with one of our resin specialists by clicking the Help button at the bottom right of your screen.
UltraClear Epoxy—Trusted by over 1 Million+ Happy Customers


