Among the many ways that epoxy can be customized—colorants, etching, layering, etc.—placing embedments within your resin is one of the most fun and versatile options.
But knowing how to do it properly is essential to success, as placing embedments carries with it a small risk of blemishes in your epoxy, whether they be clouding, air bubbles, scratches, or something else.
In this article, we'll discuss three different methods for properly embedding small objects and other items into your epoxy resin projects.

What kinds of objects can you embed in epoxy?
Epoxy is highly compatible with numerous materials. Though most of the time the material it bonds to is a typical substrate material (e.g., granite), this compatibility is also applicable with embedments.
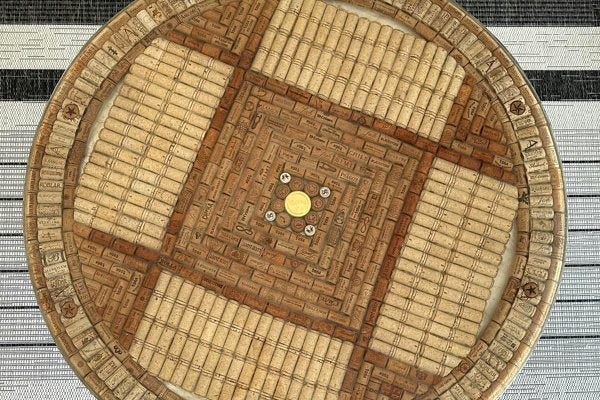
For the most part, almost anything can be embedded within epoxy, provided that it will fit (i.e., is small enough). Here are some examples of common objects that many epoxy users place in their projects:
- Paper mementos and other memorabilia
- Coins
- Bottle caps
- Bottle corks
- Natural objects like pebbles, seashells, and minerals
- Small artistic creations (e.g., figurines and carvings)
- Fine materials such as glitter and sand
There's an abundance of other possibilities, but those are some of the ones we've seen the most.


What kinds of objects should not go in epoxy?
Despite it's highly receptive nature, there are still some things that should not be embedded within epoxy:
- Most organic materials/substances. These are things like plants, animals, and food.
- Anything containing moisture. This obviously includes liquids but also things like fresh flowers or any piece of art that hasn't fully dried.
- Any object you'd like back. It's quite difficult to remove objects from epoxy once you've embedded them and allowed it to cure. In some cases, there's no way to get it back in its original condition, so choose only items you're okay with using as a project embedment.
We've written a guide on embedding dried flowers! Check it out here.

Which epoxy is best for embedding objects within?
At UltraClear, we have three types of resin designed for sealing, finishing, and art.
These products are:
-
UltraClear Bar & Table Top Epoxy—The original. Designed as a powerful, resilient sealant for furniture and fixture surfaces.
-
UltraClear Art & Craft Epoxy—Our unique epoxy variant intended for use in resin art projects.
- UltraClear Deep Pour Epoxy—Our low-viscosity, deep casting resin, specializing in much thicker layers (of up to 2 inches!)
While each of these resins is highly receptive to embedments, they do differ on layer depth, and that does affect what size object you can place in the resin.
For large objects that require deep resin layers, try Deep Pour Epoxy.
For project that uses small objects, any epoxy is usually fine, but for larger objects or complex projects, our UltraClear Deep Pour Epoxy is the way to go. With a lower viscosity and deep layer support, it's the ideal choice for fully immersing bigger items without developing blemishes.

3 methods for embedding things within epoxy
There are 3 conventional methods for placing and sealing objects within an epoxy finish.
These methods are:
- Gluing down
- Affixing via seal coat
- Base layer embedding
Below, we'll explain each method in detail.
Embedding Method #1: Gluing Down Your Objects
The first method involves using glue to affix your items to a substrate surface, and it's a method that can be performed prior to applying any of the epoxy, including a seal coat.
How to apply this technique:
- For this, you'll need some ordinary glue (not hot glue).
- Apply some glue to the substrate surface or your object.
- Adhere the object to the substrate.
- Repeat this process for everything you want embedded, then let the glue dry before moving onto the seal coat or flood coat steps.
Embedding Method #2: Using a Seal Coat to Secure Your Objects
This method is similar to the first. It involves adhering your objects with an epoxy seal coat instead of glue.
How to apply this technique:
- Begin by applying a partial seal coat. (You can learn how to do so here.)
- Carefully position the items on the substrate by pressing them into the partial seal coat.
- Finish applying the seal coat, including over the embedments until they too are coated with the seal coat.
- Give the seal coat a full 24 hours to partially cure.
- Move onto the next step—typically applying a flood coat.
Embedding Method #3: Apply a Base Layer of Epoxy to Suspend Your Objects In
The third method involves applying a lesser flood coat (usually preceded by a seal coat) of epoxy at first, then suspending your objects atop it before coating them with a second, final flood coat.
How to apply this technique:
- Perform your project like normal up to the deep coat or flood coat phase.
- Apply a small flood coat to partially fill your project substrate or resin mold.
- Give the flood coat a few hours (this varies but can be 4 to 10 hours usually) to partially cure. This partially cured state will prevent any objects you place from sinking to the bottom of the layer.
- Arrange your objects as desired atop the partially cured layer.
- Prepare a second (usually final) flood coat batch and carefully apply it over the previous layer and the embedments until your layer is complete.
- Finish up your project as normal, including air bubble removal and full curing.

Object/Material Placement Tips
- You can use tweezers to place small or delicate objects into your epoxy with precision.
- Make sure any objects you place are well situated before moving on. It's much better to take a moment and make sure everything is good than to undo a mistake later.
- For absorbent items like paper, it's strongly recommend you use the gluing method and apply a coating of something like Mod Podge to them. This will act as a barrier between the absorbent material and the epoxy, preventing the items from warping or getting a soggy paper look.

Have Questions? Want Advice? We're Here to Help!
If you have any questions about epoxy resin, or if you'd like assistance in planning an epoxy project, please reach out to us at UltraClear Epoxy—our epoxy experts are ready to assist!
You can contact us via phone or email here. During business hours, you can also text chat online with one of our resin specialists by clicking the Help button at the bottom of your screen.
In our online store, you'll find a variety of useful tools and supplies, ideal for resin projects, plus our award-winning UltraClear Bar & Table Top Epoxy and our UltraClear Deep Pour Epoxy.
UltraClear Epoxy—Trusted by over 1 Million+ Happy Customers


