Why Leveling Matters
When working with epoxy resin, many assume that its self-leveling nature guarantees a smooth, flawless finish. But in truth, epoxy can only settle evenly if the surface underneath is properly leveled.
An unlevel—or unstable—substrate can cause epoxy to pool in one area, run off the edge, or cure with uneven thickness. These problems are not just cosmetic—they may also affect the durability, function, and longevity of your project.
This guide explains how to ensure your work surface is level before every pour, and why that step is essential for achieving professional results.

How Uneven Surfaces Affect Epoxy Projects
Even a slight tilt or slope in your surface can lead to major complications during the epoxy curing process. Epoxy is designed to be self-leveling, but it can only do this effectively when the substrate it's poured onto is properly leveled.
Let’s break down how uneven surfaces can negatively affect different types of epoxy projects.
Bar Tops and Table Tops:
When pouring epoxy onto a bar or table top that isn’t perfectly level, gravity will pull the resin toward the lowest point. This creates thin spots on one end and excessive buildup or even runoff on the other. Not only does this look unprofessional, but it also diminishes in some areas the protective barrier the epoxy is meant to provide.
Over time, these inconsistencies can lead to premature wear or cracking. Additionally, trying to sand or recoat an unlevel epoxy surface later can result in even more labor-intensive fixes.
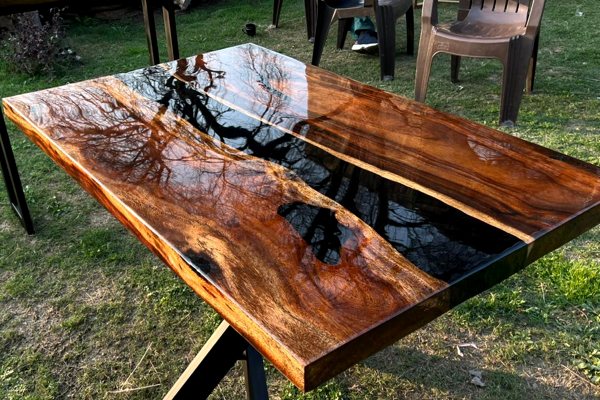
River Tables and Casting Molds:
Projects that use forms or molds—especially deep pour types like river tables—are particularly vulnerable to uneven setups. If the mold isn’t level, the epoxy will cure with a visible lean, making one side taller or thicker than the other. This affects both the visual balance and the structural integrity of the piece. For example, embedded objects like stones, shells, or wood inlays may shift during curing if gravity pulls them toward a lower edge.
Correcting these kinds of imbalances often requires a complete re-pour or extensive sanding and trimming.
Resin Art:
Artistic epoxy projects, such as ocean wave panels, fluid art pieces, or layered pigment pours, rely on the predictable movement of resin. An uneven work surface disrupts that movement, causing color separations to shift, waves to pool in corners, and cells or lacing effects to form unevenly.
When this happens, your artistic vision can be lost entirely. What should have been a symmetrical or centered design may appear skewed or stretched by the time the epoxy cures.

The Best Solution Is Prevention
Because epoxy starts to cure soon after mixing, there’s limited time to fix these issues once they occur. That’s why identifying and correcting any level problems beforehand is one of the most important steps in preparing for a successful epoxy pour.
Common signs of an uneven surface include:
-
Pools of epoxy collecting in corners or along one edge.
-
Tapered edges where the resin appears too thin.
-
Visible slanting in embedded items.
-
Color distortion or drift in artistic pours.

Tools You’ll Need for Leveling
Achieving a level surface begins with having the right tools—both for detection and correction. Each of the following tools serves a specific purpose in helping you identify uneven areas and adjust accordingly before any epoxy is poured.
-
24"–48" Bubble Level
-
This is your primary tool for checking the level of your surface. A longer level provides better accuracy across a wider span, which is crucial for larger surfaces like table tops and bar tops.
-
Look for a level with multiple vials for horizontal, vertical, and 45° readings. Use it in several directions—side to side, front to back, and diagonally—to check for dips, slopes, or twists in the surface.
-
-
Laser Level
-
Ideal for large-scale projects, a laser level projects a straight, visible line across your workspace, allowing you to detect inconsistencies over a long distance.
-
This is especially helpful when leveling workbenches, epoxy river table molds, or any surface wider than your average handheld level.
-
For best results, mount the laser on a tripod at a consistent height and compare multiple points against the projected line.
-
-
Shims and Wedges
-
These small but mighty tools help you fine-tune your surface. Wood or plastic shims can be inserted under the legs of your table or under corners of a mold or tray to correct slants.
-
Wedges are useful when you're adjusting thicker or heavier surfaces, as they allow for gradual elevation changes without sudden shifts.
-
-
Carpenter’s Square or Flat Straight Edge
-
These are valuable for detecting bowing or warping in the surface itself, especially in wood slabs or live-edge materials.
-
Run the edge along your project material to see if any spots dip or bulge.
-
This is a crucial step in preventing epoxy from flowing into low areas or curing unevenly due to unseen irregularities.
-
-
Workbench with Adjustable Feet (Optional but Highly Recommended)
-
If you frequently work on epoxy projects, investing in a workbench with adjustable legs can dramatically improve your leveling accuracy.
-
These allow for quick micro-adjustments and ensure your workspace can remain stable even on slightly sloped flooring—a common issue in garages or basements.
-
Pro Tip: Marking your level points on the table legs or shims after adjustment can save time for future projects, helping you recreate the same perfect setup every time.
With the right tools and a careful approach, you’ll give your epoxy projects the best chance of success—free from pooling, runoff, or uneven curing.


Step-by-Step Guide: How to Level Your Work Area
Step #1: Choose the Right Work Surface
Start with a sturdy, vibration-free table or bench. Avoid surfaces that bow under weight or are made of warped materials. Particleboard and flexible plastic may distort under pressure—opt for thick plywood or a solid workbench.
Step #2: Use a Level to Check the Plane
Place your level on the surface in several directions:
-
Front to back
-
Left to right
-
Diagonally
Note any slope or tilt. If using a large board, check multiple zones to detect twists or warping.
Step #3: Make Adjustments
Use shims, leveling feet, or wedges under your bench or project base to correct the angle. Re-check with the level each time you make an adjustment. For large projects, a laser level will help you align multiple points across a wide area.
Step #4: Test with Water (Optional but Helpful)
Before you mix your epoxy, you can pour a thin layer of water onto the surface. Watch where it pools—this will reveal any tilt or sag. Make additional adjustments as needed. Once done, mop up the water completely and ensure the surface is dry before starting your epoxy work.

Best Practices for Staying Level During the Pour
Even after you’ve thoroughly leveled your work surface, its really important that you maintain that level throughout the entire pouring and curing process. Epoxy takes time to settle and cure, and any shift during that period can cause uneven results.
Below are the most effective ways to ensure your project stays perfectly level from start to finish. By integrating these best practices into your workflow, you'll greatly reduce the risk of uneven cures or sloped surfaces—ensuring your epoxy finishes come out smooth, symmetrical, and professional-grade every time.
Tip #1: Double-Check Immediately Before You Pour
It’s easy to make slight shifts while setting up tools or adjusting molds, so always recheck your surface with a level just before mixing your epoxy. A quick verification at this stage can prevent costly do-overs and surface flaws.
Tip #2: Secure the Workbench or Table
Movement during the curing window is one of the most common causes of slanted finishes. Use non-slip pads under table legs or lock caster wheels if your bench is mobile. Avoid walking into or leaning on the table while the epoxy is wet. If possible, isolate the table in a low-traffic area to minimize disturbances.
Tip #3: Use Locking Clamps for Loose Forms or Panels
For smaller projects, such as trays or resin art on panels, clamp the project frame to your work surface to keep it from shifting or being bumped. Vibrations or accidental touches can cause the piece to tilt slightly, creating visible imperfections once the epoxy cures.
Tip #4: Avoid Overhead Air Movement
Surprisingly, ceiling fans or strong vents can cause minor vibrations or air pressure changes that may affect your epoxy as it settles. Turn off nearby fans or HVAC vents during the pour and the initial curing period to avoid creating any subtle disruptions that affect leveling.
Tip #5: Mark Table and Shim Positions for Future Pours
If you've taken time to perfectly level your table using shims or adjustable feet, mark the positions with tape or permanent marker. This way, you can quickly recreate the setup for your next pour without starting from scratch. This is especially useful for recurring projects or when working in shared workshop spaces.
Tip #6: For Multi-Day or Multi-Layer Pours, Recheck Between Layers
Projects that require multiple pours—such as deep river tables or layered art pieces—are more prone to minor shifts between sessions. Weight distribution changes, ambient temperature swings, or simply moving the piece between coats can compromise the level. Recheck and re-level as necessary before adding a new layer.
Tip #7: Avoid Uneven Weight Distribution During Pouring
When pouring across a large surface, apply resin evenly rather than pouring it all at one end first. Dumping all your epoxy in one spot can cause that side to sink slightly, especially if the table isn't extremely sturdy. Pour in a zigzag or grid pattern and use a notched trowel or spreader to distribute the resin evenly before letting it self-level.
Tip #8: Monitor Early Curing Period
In the first 15–30 minutes after pouring, check the project occasionally (without touching it) to ensure nothing has shifted. Look for epoxy drifting toward one side or pooling unevenly. If caught early, you may still have time to make subtle corrections by adjusting the shims or gently repositioning the project.

Common Mistakes to Avoid
Leveling may seem like a straightforward task, but small oversights can have significant consequences during an epoxy project. Here are some of the most frequent mistakes—and how to steer clear of them:
Using the Floor as Your Base
Floors, especially in garages or older workshops, are rarely truly level—even if they appear flat to the eye. Many are designed to have a slight grade for drainage purposes, and some may have settled unevenly over time
Pouring epoxy directly on a floor can result in runoff, uneven thickness, and distortion of embedded objects or design elements. Always use a dedicated workbench or platform, and check its level independently of the floor beneath.
Assuming One Check Is Enough
A surface that was level yesterday might not be today. Shifting weight, vibrations, temperature-induced expansion or contraction, and even moving the project slightly can affect the level. It’s essential to check your surface multiple times: before placing the project, after adding weight (such as a mold or slab), and just before pouring.
Consistent rechecking is the best way to prevent gradual misalignment from sabotaging your results.
Skipping Edge and Corner Checks
Many users focus only on the center of their project when leveling, missing subtle tilts at the corners or edges. This is especially common with larger projects like table tops or river tables, where the surface may be level in one direction but uneven in another.
Always check in multiple directions and locations—including each corner and along the edges—to ensure consistent flatness across the entire surface.
Relying Solely on Smartphone Leveling Apps
Digital apps can be convenient, especially for small trays or tight spaces, but they lack the precision of dedicated tools. Factors such as your phone case, screen protector, or even the device’s calibration can skew readings.
Use physical tools like a spirit level or laser level to get accurate measurements. If you do use a smartphone app, use it only for quick spot checks—not as your primary reference.
Failing to Secure the Work Surface
Even a level workbench can shift slightly if it's not stable. This often happens in shared or mobile spaces where tables have wheels or are placed on uneven flooring.
Make sure your bench is locked, braced, or stabilized, especially during deep or long cures. Any movement after the pour begins can cause a lopsided surface that ruins the self-leveling performance of the epoxy.
Overlooking Structural Sag or Warping
A surface that seems level may still have minor dips or flexing points, especially if it’s made of thinner wood, composite material, or unsupported panels. Before pouring, inspect the surface under load. Stand back and look for bowing.
Place a straightedge or long level across wide sections to catch subtle warps that aren't visible with a short tool.

Leveling for Niche Projects
Epoxy Trays or Molds
-
Place a small bubble level on the frame or mold base.
-
Add thin shims under one or more sides to correct any angle.
-
Double-check after placing the mold on your table.
Wall Art or Vertical Pours
-
Use clamps or mounts on a tiltable frame to achieve a perfectly flat position.
-
For angled designs, still ensure the epoxy won't run off the panel.
Live-Edge Wood Projects
-
Natural slabs can have irregular shapes. Add supports or spacers under edges or knots.
-
Check the surface plane after positioning and before pouring.

Why UltraClear Epoxy Performs Best on a Properly Leveled Surface
UltraClear Epoxy is engineered to self-level—meaning it will flow out to a smooth, even surface when the conditions allow it. But it can't compensate for an uneven work surface. Ensuring your table or mold is level allows the resin to perform at its best, reducing the need for sanding, scraping, or fixing afterward.
When paired with proper preparation, UltraClear Bar & Table Top Epoxy delivers a consistently clear, level finish that’s durable and visually stunning.

Have Questions? Want Advice? We're Here to Help!
If you have any questions about leveling your substrate or about epoxy resin, or if you'd like assistance in planning an epoxy project, please reach out to us at UltraClear Epoxy—our epoxy experts are ready to assist!
You can contact us via phone or email here. During business hours, you can also text chat online with one of our resin specialists by clicking the Help button at the bottom of your screen.
In our online store, you'll find a variety of useful tools and supplies, ideal for resin projects, plus our award-winning UltraClear Bar & Table Top Epoxy and our UltraClear Deep Pour Epoxy.
UltraClear Epoxy—Trusted by over 1 Million+ Happy Customers


