When it comes to home decor, renovating or refreshing older countertops is an exciting prospect.
Sometimes, in lieu of replacing your countertops entirely, you have the opportunity to refurbish your countertops instead, maintaining their iconic presence in your home or business while making them look good as new, and one of the best ways to do so is by coating your countertop surfaces with an epoxy resin finish.
Epoxy resin, a great option for countertop refurbishing
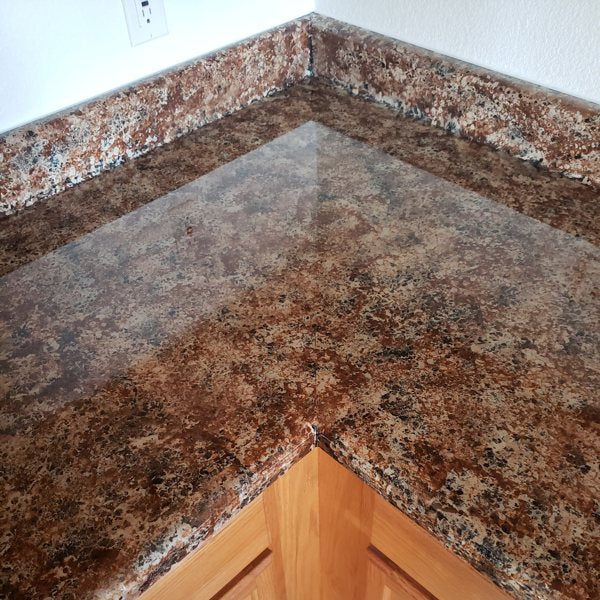
Finishing a countertop with epoxy resin is a tried-and-true modern method for safeguarding your countertop surfaces while preserving the aesthetic qualities that make them distinct.
If you have a set of countertops that you consider appealing, whether because they're made from an expensive or beautiful material, or perhaps because they hold some sentimental value to you personally, coating them with epoxy is often an exceptional choice.
Epoxy resin is highly compatible with countertop materials. Click here for some examples.
Can you epoxy over old countertops?
We're often asked whether you even can epoxy over old countertops. The short answer is, "Yes, absolutely." Read on to learn how to go about this, and why it isn't as complex as it may sound.
Using epoxy on older countertops is pretty much the same as using them on new countertops, so the standard process should apply. This also means it's a relatively beginner-friendly process.
Before you begin, we recommend giving your surfaces a good cleaning to prepare them for the epoxy resin coating.
Also, depending on the countertop material, you may need a light sanding first, but otherwise it's just a matter of going through the standard epoxy steps.
As for determining how much epoxy you'll need, you can get an estimate on how much epoxy you'll need using our UltraClear Epoxy Coverage Calculator, or you can contact us for additional assistance.
To apply epoxy to an old countertop, do the following:
-
First, gather the necessary materials. This includes a countertop-suitable epoxy resin, as well as some appropriate tools and supplies.
-
Prepare your workspace. Make sure it's properly conditioned for optimal curing. Place the things you need in a convenient location so that they're easy to reach but not likely to be bumped into or knocked over.
-
Apply a seal coat of epoxy resin. This is a thin, manually brushed-on coat of epoxy intended to seal in the pores and push air out of them. Afterward, let the seal coat partially cure for 4 to 6 hours.
-
Apply your flood coat. Depending on the countertop size, it make take multiple batches. You don't have to rush; just do them sequentially one after another and apply them before any significant curing has occurred.
-
Use a heat gun or torch to remove any air bubbles. Ten minutes after, check the finish again to see if new air bubbles have shown up. If you see any just want to be sure, do a second pass with the heat gun or torch.
-
Allow the epoxy finish to cure for 72 hours in good climate conditions. If you can't maintain the ideal conditions, your epoxy may still cure as long as it isn't too cold or humid, but it will take longer. Try to give it a full week if you're not sure.
Note: Epoxy brands vary, both in quality and how you apply them. If you're using our premium UltraClear Bar & Table Top Epoxy, you can always download a digital set of instructions on our support website.
Some tips for working with epoxy resin
Epoxy resin is a surprisingly straightforward sealant to work with. It's beginner-friendly and doesn't take a lot of hands-on time or effort. Still, there are some basic tips that can help you achieve optimal results:
- Always measure your epoxy carefully. Getting that ratio right—according to your chosen epoxy brand—can help ensure you get rock-solid, bubble-free results.
- Take your time when mixing and pouring. There's no need to rush through these steps, as most epoxy resins will have a reasonable working time before the curing process advances.
- Don't reuse mixing containers. You can usually reuse stir sticks and mixing drill bits, but never reuse the containers you blend the components in.
Additional Resources
We hope the information in this article has been of help to you. Here are a few additional resources you may find useful:
- Epoxy: Proper storage, shelf life, and preventing "yellowing" - Learn how to store your epoxy when you're not ready to use it.
- How to wash away resin and epoxy on your hands and skin - Accidents happen sometimes, even to the pros. Knowing how to clean epoxy off your skin can be useful if you make a mistake.
- Our step-by-step guide to mixing epoxy resin - Understanding how to mix epoxy resin is essential to getting a crystal-clear finish.
Have questions? Want advice? Contact us!
If you have any questions about using epoxy on your countertops, or if you'd like assistance in planning an epoxy project, please reach out to us at UltraClear Epoxy—our epoxy experts are ready to assist!
You can contact us via phone or email here. During business hours, you can also text chat online with one of our resin specialists by clicking the Help button at the bottom of your screen.
In our online store, you'll find a variety of useful tools and supplies, ideal for resin projects, plus our award-winning UltraClear Bar & Table Top Epoxy and our UltraClear Deep Pour Epoxy.


