Welcome to our guide on mixing epoxy!
One of the most important steps of an epoxy project is when you have to mix up a batch of epoxy resin, small or large.
Doing this successfully isn't difficult, but does require following some precise instructions.
In this guide, we explain how to properly mix up an epoxy batch so that it's well-blended and ready for application.
How to mix epoxy resin
The mixing instructions for epoxy resin vary slightly by the size of the batch you'll be making.
Smaller batches
Small batches of epoxy (less than 3/4 of a gallon) should be mixed manually using stir sticks.
The reason for this is that a power drill is too strong even at the lowest viable speed setting. Power drills tend to pull in a lot of air, which then forms numerous air bubbles in your resin batch, thus ruining it.
While air bubbles can be dealt with, if there are too many, it becomes nearly impossible to remove them all. It's best to do things the right way to avoid this issue entirely.
Larger batches
Larger epoxy batches (3/4 of a gallon or more), on the other hand, can be mixed with a power drill and a suitable mixing bit to do most of the work.
You'll still use stir sticks briefly to make sure everything is thoroughly blended and nothing gets missed, but the power drill will make this whole step much easier.
Below, we give two different methods of mixing. The first will be for small batches. The second will be for larger batches.

But before we begin... let's talk about epoxy colorants.
[If you aren't interested in using colorants, click here to jump straight to the mixing steps.]
Epoxy resin is naturally transparent. When it cures, it visually resembles glass. Most resin users keep their epoxy clear like this.
However, epoxy can also be infused with any of a wide variety of suitable colorants to give it vivid shades of color.
These colorants come in two forms: epoxy pigments and resin dyes.
Epoxy pigments
Epoxy pigments are powder-based colorants made with ground mica and other minerals (and sometimes synthetic materials).
These pigments can be added during mixing in small amounts until the desired color intensity is achieved. The more you add, the stronger the effect and the more opaque (i.e., less transparent) the epoxy becomes.
Epoxy pigments tend to have a shimmering effect due to the many tiny particles that make up the powder. Light hits these particles at different angles, which give off a gentle sparkle.
There are also pearlescent powders which provide a subtler appearance.
Resin dyes
Resin dyes, in contrast, are synthetic liquid colorants. They imbue epoxy resin with singular tones that lack the shimmering effect of powder pigments.
These dyes are perfect when you want a consistent shade throughout the entire epoxy coating.
Much like with epoxy pigments, these dyes are potent. They should be added in small amounts until the desired effect is achieved. The more you add, the more vivid and opaque the epoxy becomes.
Why this matters.
If you'd like to color your epoxy resin, you'll need to have the pigments or dyes you want ready before you begin mixing.
They get added partway through the mixing process, allowing them ample time to blend seamlessly with the epoxy resin while also giving you the space you need to adjust the color correctly.
Because epoxy has a working time (which varies by resin type), you'll only have a certain window of opportunity to do this before you must apply the epoxy.
After the working time expires, the epoxy will be too far into the curing process to pour as it should, and you may end up with blemishes or other issues.
Where to get these colorants.
You can get premium-quality pigments and dyes from our UltraClear Epoxy store.
We offer Pigmently branded products because they've worked well for us, with consistent results and a large selection to choose from.
You can find them on the following pages:
- Epoxy powder pigments by Pigmently
- Epoxy resin dyes by Pigmently
Click here to learn more about epoxy colorants.
Now with that all said, let's get started!


Method #1: How to mix smaller batches of epoxy
Small epoxy batches are ideal for making seal coats as well as flood coats for small projects such as epoxy tumblers, resin jewelry, and epoxy coasters.
Here's what you'll need:
- Stir sticks: You can find these in many places. In our store we offer high-quality Poly Pro Stir Sticks. These are great because they're reusable and feature molded-pass oval holes to reduce resistance for easier mixing and a smoother blend.
-
Mixing containers: You'll need one mixing container for each batch of resin you'll be making. Mixing containers should never be reused.
To make measuring easier, we recommend containers with clear measurement lines on the sides.
In our store, we offer two sizes of graduated mixing containers: a one-quart container and a five-quart container. These containers have clear-cut volume markings for accurate measurements. -
Epoxy resin: Be sure to choose a good quality epoxy resin brand from a reputable dealer.
There are a lot of low-cost budget brands out there that have been imported into the U.S. and aren't held to the same regulatory standards. These budget brand epoxies can end up failing early or not curing properly even if you do everything else right.
If you don't already have an epoxy brand chosen, we'd love for you to consider our UltraClear Epoxy brand. Each of our resins are premium-grade and will last for a minimum of 7 years if handled correctly. This can be extended with proper care.
You can find our UltraClear resins on the following pages: - UltraClear Table Top Epoxy - Our strongest resin finish.
- UltraClear Deep Pour Epoxy - Our deep pour casting resin.
We also recommend wearing nitrile gloves and an N95 or KN95 respirator while working with epoxy resin. While epoxy is much safer in its uncured state than many other polymers would be, it's still wise to take some minor precautions.
Step #1: Measure your epoxy
Once you have your work space set up, the first thing you'll need to do is measure the epoxy into your mixing container.
Follow the guidelines for the resin you chose, as each type of resin has a specific ratio that it needs to be combined in.
For example, our UltraClear Table Top Epoxy uses a 1:1 ratio, meaning equal amounts of hardener and resin should be mixed together for a successful batch.
Always measure by volume, not weight.
Step #2: Mix your epoxy manually with stir sticks.
For smaller batches (3/4 of a gallon combined or less), you'll use stir sticks to mix your resin.
Simply lower the stir stick to the bottom of the container and being mixing. You'll do this for 2 to 3 minutes in most cases, though be sure to check your chosen brand's instructions for variations.
While mixing, be sure to scrape the sides of the container as well as the bottom of it to ensure all of the resin is blended.
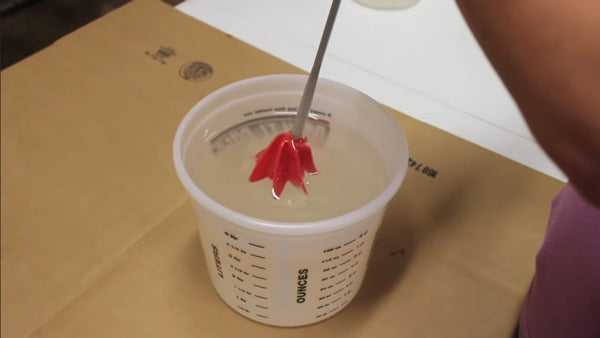
During this step of the process, you can also add any epoxy colorants you'd like to use. Start small and add more until you reach the desired look.
Step #3: Once you're done mixing, apply the epoxy immediately.
After mixing, most table top epoxies will have a working time of about 5 minutes. You need to brush or pour this epoxy within that time to make sure it doesn't cure before it's able to settle.
For casting resins like our UltraClear Deep Pour Epoxy, the working time is far more lenient. Deep pour casting resins often have a working time of about 30 minutes.
And that's it for Method #1!
After this, you'll remove air bubbles. Then you can repeat the process as needed until your project is complete.
See your epoxy instructions for more details on applying additional layers and finishing up.

Method #2: How to mix larger batches of epoxy
Larger batches of epoxy are a little bit more complicated, but they're also easier on the arms because you'll be able to use a power drill.
Batches of this size are often intended for flood coats on big epoxy projects such as epoxy countertops, table tops, etc.
Here's what you'll need:
- A power drill and mixing drill bit: Together, these will do most of the blending for you. You can find an excellent reusable mixing drill bit in our store and probably at most local hardware or home improvement stores.
-
Stir sticks: You'll use these occasionally to scrape the sides and bottom of your mixing containers to ensure a comprehensive blend.
The Poly Pro Stir Sticks in our store are perfect for this. -
Mixing containers: You'll need one mixing container for each batch of resin that you'll be mixing. Mixing containers should never be reused.
To make measuring easier, we recommend containers with clear measurement lines on the sides.
In our store, we offer five-quart containers that feature graduated mixing lines for measuring the volume of large resin batches accurately. -
Epoxy resin: Be sure to choose a good quality epoxy resin brand from a reputable dealer.
If you're not sure how much you need, take a look at our measuring guide.
If you don't already have an epoxy brand chosen, we'd love for you to consider our UltraClear Epoxy brand. Each of our resins are premium-grade and will last for a minimum of 7 years if handled correctly. This can be extended with proper care.
You can find our UltraClear resins on the following pages: - UltraClear Table Top Epoxy - Our strongest resin finish.
- UltraClear Deep Pour Epoxy - Our deep pour casting resin.
We also recommend wearing nitrile gloves and an N95 or KN95 respirator while working with epoxy resin. While epoxy is much safer in its uncured state than many other polymers would be, it's still wise to take some minor precautions.
Step #1: Measure your epoxy
Once you have your work space set up, the first thing you'll need to do is measure the epoxy into your mixing container.
Follow the guidelines for the resin you chose, as each type of resin has a specific ratio that it needs to combined in.
For example, our UltraClear Table Top Epoxy uses a 1:1 ratio, meaning equal amounts of hardener and resin should be mixed together for a successful batch.
Step #2: Use a power drill and mixing bit to blend the epoxy
For larger batches of up to a gallon (never go above a gallon for a single batch), you'll mostly be using your power drill.
As usual, we recommend following the instructions on your chosen brand of epoxy for optimal blending.
With that said, here are some general guidelines.
- Start by placing the mixing bit deep into the container, it should be near the bottom.
- Use the medium speed setting on your drill to blend the epoxy while gently moving in circular motions. Do not raise the drill at all during this, or you'll pull in air.
- After two minutes, pause the drill and use a stir stick to scrape the sides and bottom of the container. This should loosen up any resin that started to stick.
- If you're using colorants, now is a good time to add them. Start small and add more as needed until satisfied.
- Place the drill back into position and resume for another 2 to 3 minutes.
Step #3: Apply the epoxy immediately.
After mixing, most table top epoxies will have a working time of about 5 minutes. You need to pour this epoxy within that time to make sure it doesn't cure before it's able to settle.
For casting resins like our UltraClear Deep Pour Epoxy, the working time is far more lenient. Deep pour casting resins often have a working time of about 30 minutes.
And that's it for Method #2!
After this, you'll remove air bubbles. Then you can repeat the process as needed until your project is complete.
See your epoxy instructions for more details on applying additional layers and finishing up.

Additional Resources
We hope this article has been helpful for you.
Below, we've linked some additional resources you may find useful:
- Epoxy: Proper storage, shelf life, and preventing "yellowing": This is our guide to storing opened and unopened resin bottles, as well as how to prevent yellowing.
- How to wash away resin and epoxy on your hands and skin: Tried-and-true methods for cleaning epoxy off your skin.
- Five beginner friendly tips for pouring epoxy resin: Guidelines for getting great results when pouring an epoxy batch.
Have questions? Want advice? Contact us!
At UltraClear Epoxy, one of our highest priorities is providing top-notch customer service.
If you have any questions about epoxy resin, or if you'd like planning advice for an epoxy project, please reach out to us. Our epoxy experts are ready to assist!
You can contact us via phone or email here.
During business hours, you can also text chat online with one of our resin specialists by clicking the Help button at the bottom right of your screen.


