Live edge tables blend the rustic charm of natural wood with modern elegance. When paired with a crystal-clear epoxy resin finish, a live edge table top becomes a stunning centerpiece that is both durable and visually striking. In this guide, we'll walk through everything you need to know—from selecting your wood slab to applying the epoxy finish.

The Appeal of Live-Edge Decor
What is live-edge wood?
Live-edge wood maintains the natural, organic shape of the tree it came from, preserving its knots, curves, and imperfections. This style highlights the unique character of each piece, making every table top a one-of-a-kind work of art.
The role of live-edge furniture
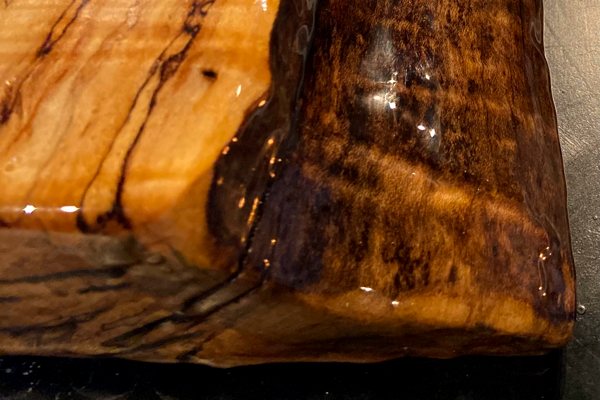
Live-edge furniture fits beautifully into a range of interior designs, from rustic and farmhouse to industrial and contemporary. Combining live-edge slabs with epoxy enhances the wood’s natural beauty while offering exceptional durability, making it a smart, stylish choice for functional furniture.

Benefits of Using Epoxy on Live-Edge Wood
Applying epoxy to a live-edge table top does more than create a glossy finish—it also provides a host of functional and aesthetic benefits, such as:
-
Sealing the wood against moisture, scratches, and wear with a waterproof surface.
-
Enhancing natural colors and grain detail, making natural patterns pop.
-
Fills gaps and imperfections for a smooth, even surface.
-
Strengthens the overall structure, preserving the table for years of use, with minimal upkeep or maintenance needs.
Compared to varnish or polyurethane, epoxy provides superior depth, clarity, and toughness, making it an ideal option for live edge projects.


Step-by-Step Guide to Creating a Live Edge Epoxy Table Top
#1: Select Your Live Edge Slab
Choose a quality slab that fits your desired dimensions. Look for wood types like walnut, maple, oak, or cherry, which are popular for their strength and attractive grain patterns.
#2: Prepare the Wood
-
Remove bark: Use a drawknife to carefully strip any bark while preserving the natural edge.
-
Sand the surface: Start with coarse sandpaper (around 80-grit) and work up to finer grits (220-grit) to smooth the wood.
-
Clean the slab: Wipe away dust and debris with a tack cloth.
#3: Seal the Wood
Because wood is porous, sealing it is important to prevent air bubbles in the epoxy:
-
Apply a thin layer of UltraClear Bar & Table Top Epoxy with a brush.
-
Allow it to cure partially before proceeding to the next step.
You can learn more about epoxy seal coats here.
#4: Build a Mold or Frame (If Needed)
For river tables or slabs with large voids:
-
You can create a mold using melamine boards and apply release tape or wax to prevent sticking.
-
Seal all seams with silicone caulk.
#5: Mix and Pour the Epoxy
-
(If you have any deep areas to fill, use UltraClear Deep Pour Epoxy, as it supports layers of up to 2 inches deep.)
-
Either way, mix your epoxy slowly and thoroughly, scraping the sides and bottom of the container.
-
Pour in stages if necessary, using a heat gun between layers to remove bubbles.
For the final surface coat, use UltraClear Bar & Table Top Epoxy to achieve a flawless, glass-like finish.
#6: Optional Finishing Touches
Once the epoxy has finished curing, you can do any or all of the following, as desired.
-
After curing, sand the surface lightly if needed.
-
Apply a final polish or buff for extra gloss.
-
Attach legs or a base suited to the style of the table if you haven't already.

Why Your Choice of Epoxy Matters
Not all epoxy products are created equal. Low-cost imported resins often cure with cloudiness, yellow over time, or develop soft spots that mar the beauty and durability of your table top.
These issues are prevalent in imported epoxies, which are developed overseas in locations with lax quality control. Once imported, they're sold to unsuspecting users who often don't discover the faults of the product until it's far too late.
Learn more about these issues here.

UltraClear Epoxy: Premium Resins for Pristine Results
Unlike budget-brand epoxy dealers, UltraClear Epoxy doesn't compromise on quality or safety.
All of our epoxies stand apart because they're:
-
100% made in the USA.
-
Crystal-clear and UV-resistant to prevent yellowing.
-
Extremely durable and scratch-resistant.
-
User-friendly with minimal bubble formation.
Whether you’re an experienced craftsman or a first-time DIYer, UltraClear Bar & Table Top Epoxy and UltraClear Deep Pour Epoxy deliver professional-grade results you can rely on.

FAQs: Working with Live Edge and Epoxy
Question #1: Can I leave the bark on my live edge table?
It’s generally recommended to remove the bark. It may loosen over time, even under epoxy, leading to cracks or voids.
Question #2: How thick should I pour the epoxy?
For deep pours (like river tables), use UltraClear Deep Pour Epoxy, which can be poured up to 2 inches thick per layer. For surface coatings, UltraClear Bar & Table Top Epoxy is ideal.
Question #3: How do I prevent bubbles when applying epoxy?
Seal the wood first, mix the epoxy slowly, and use a heat gun or torch after pouring to eliminate bubbles.
You'll find guides to each technique on the following pages:
- Our in-depth guide to epoxy seal coating
- Our step-by-step guide to mixing epoxy resin
- Epoxy resin tips: Preventing and removing air bubbles
Question #4: How long does epoxy take to fully cure?
Curing takes about 72 hours (3 days) for a usable surface. Full curing typically continues for a couple of weeks internally until reaching peak durability throughout.

Have Questions? Want Advice? We're Here to Help!
If you have any questions about crafting a live-edge epoxy table, or if you'd like assistance in planning an epoxy project, please reach out to us at UltraClear Epoxy—our epoxy experts are ready to assist!
You can contact us via phone or email here. During business hours, you can also text chat online with one of our resin specialists by clicking the Help button at the bottom of your screen.
In our online store, you'll find a variety of useful tools and supplies, ideal for resin projects, plus our award-winning UltraClear Bar & Table Top Epoxy and our UltraClear Deep Pour Epoxy.


