For any epoxy project, there are several core phases you'll go through to complete the process. Properly handling of each of these phases is essential to ensuring optimal results and achieving that incredibly strong, crystal-clear finish that high-quality epoxy is known for.
The core phases of an epoxy project
The core epoxy project phases are as follows:
- Obtaining your epoxy.
- Measuring your epoxy.
- Mixing your epoxy.
- Pouring your epoxy.
- Curing your epoxy.
Previously, we've discussed how to shop for epoxy, as well as how to measure out your epoxy components prior to blending.
In this article, we'll be discussing the 3rd phase, mixing your epoxy, by delving into 5 of the most common mistakes epoxy users make during the mixing phase. You'll learn what to do and what not to do to achieve a perfect blend.
5 common slip-ups to avoid when mixing epoxy resin.
Understanding how to mix your epoxy resin batch is essential to getting that iconic pristine finish. While not complicated, there are several less obvious things that can go wrong during this phase of the process.
Here are the 5 most common mistakes people when mixing epoxy:
- Mixing the resin with too much force.
- Using a power drill on small quantities, or raising the drill bit too high inside the container during blending.
- Not mixing the epoxy resin for a long enough time.
- Mixing the epoxy for far too long.
- Reusing mixing containers to make additional batches.
Let's take a look at each of these, one by one.
Mistake #1: Mixing the resin with too much force.
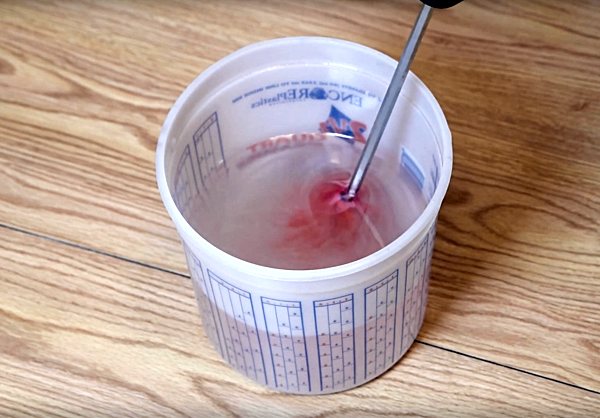
The first issue people tend to have is mixing their epoxy resin with too more force.
Forceful mixing induces air.
Mixing your epoxy resin components too quickly or vigorously can introduce a significant amount of air bubbles into the mixture, which is one of the primary reasons to avoid such an approach. Though some air is expected (and can be removed), an excessive amount of air bubbles can become difficult to deal with later.
When the resin and hardener are combined with rapid motion, air becomes trapped within the viscous liquid, forming bubbles that can be difficult to remove once the epoxy has been applied to your project.
These air bubbles not only mar the appearance of the final cured resin, giving it a cloudy or bubbled finish, but they can also compromise the structural integrity of the resin, leading to weak spots in materials that are meant to be solid and durable. The presence of air bubbles is particularly problematic in applications where a clear, glass-like finish is desired, as it detracts from the resin's inherent beauty and clarity.
Rapid mixing can start the curing prematurely.
Furthermore, mixing the components too vigorously can accelerate the curing process due to the exothermic reaction between the resin and hardener. This reaction generates heat, and when mixed too fast, the increased temperature can cause the epoxy to cure too quickly, potentially leading to an incomplete bond or a finish that is not as hard or as strong as it should be.
Rapid curing can also result in a shorter working time, reducing the window you have to apply the epoxy to your project and make any necessary adjustments.
For these reasons, we recommend you mix your epoxy resin smoothly and steadily, ensuring an even blend without introducing excessive air or hastening the curing process.
Avoiding this issue:
As mentioned above, the best way to prevent this problem is to mix deliberately and smoothly. Don't overdo it with the amount of force you apply. The goal is to produce a smooth resin batch, and high speed is not necessary for that.
Mistake #2: Using a power drill on small batches or raising the bit too high.
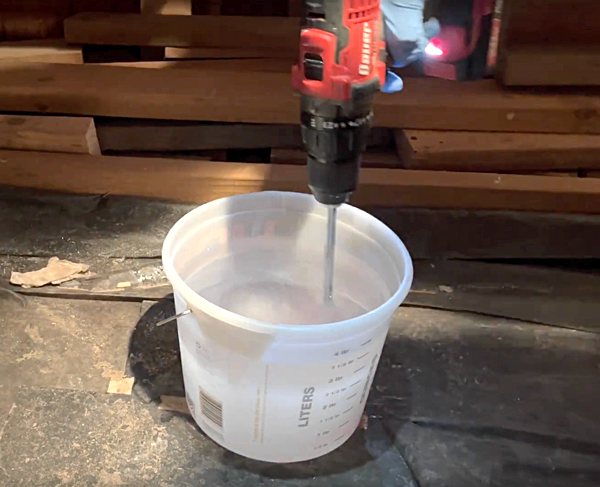
The second most common mistake we've seen is using a power drill incorrectly. There are few ways to do this that can cause problems:
- Using a power drill on too small of a batch.
- Raising the drill bit too high in a large resin batch.
- Setting the drill's mixing speed too high.
Each of these acts can pull in tremendous air, causing the formation of numerous air bubbles within the resin. While it's true that air bubbles can be removed, if there are too many it becomes very difficult to fully clear them, and the odds of leaving behind a few blemishes increases greatly.
For the first two reasons, the air gets pulled in because the drill bit is too close to the surface of the resin batch; the shape of the bit directs the flow of the air downward and into the resin.
For the third reason, it occurs because the force of a higher speed setting generates so much suction that the resin can't keep up with the motion, with air getting pulled in as well to compensate.
Avoiding this issue:
The best way to avoid this issue is to only use a power drill on large epoxy batches, close to a gallon in size. For smaller batches, we suggest manual mixing using stir sticks.
Mistake #3: Not mixing the epoxy resin for a long enough time.
Third up is the mistake of not mixing your batch for long enough.
When epoxy resin is undermixed, the components within tend to be inconsistent. The batch won't flow evenly when poured, and some residual resin may be left inside the container.
Additionally, any inadequately mixed epoxy that does flow out onto a substrate surface (or into a mold) will be unable to cure, leading to soft or sticky spots in your final resin finish.
These sticky spots can be fixed by clearing them out and applying a new batch, but that's a significant amount of extra work and can increase the cost of your project as well.
Avoiding this issue:
You can avoid this issue by making sure to fully mix your epoxy resin until the batch is ready. Any good epoxy resin, including our UltraClear Bar & Table Top Epoxy, will include a set of detailed instructions for you to follow to get the best out of your resin product.
For those of you who've chosen UltraClear, you can also find digital instructions for our epoxies on the following pages:
- UltraClear Bar & Table Top Epoxy Resin
- UltraClear Deep Pour Epoxy Resin
- UltraClear Art & Craft Epoxy Resin
Mistake #4: Mixing the epoxy resin for far too long.
4th on our list is overmixing your epoxy resin. Each type of epoxy has an optimal window of time that it should be mixed within, and extending beyond that window for too long can inadvertently lead to several issues that affect both the application process and the final outcome of the project.
Firstly, overmixing can increase the temperature of the mixture due to the heat-producing reaction that occurs when resin and hardener components combine. This rise in temperature can accelerate the curing process, which reduces the pot life of the mixture, and a shortened pot life means you have less time to first work with the resin, then apply it to your project, and finally manipulate it as needed before it begins to harden and cure.
Additionally, prolonged mixing can cause the epoxy to start curing while still in the mixing container itself, potentially leading to a waste of materials and creating a scenario where the epoxy becomes too thick or hard to work with even before it's been applied. This premature curing can not only complicate the application process but can also result in a less than optimal finish, with issues such as an uneven surface or poor adhesion to the substrate.
Avoiding this issue:
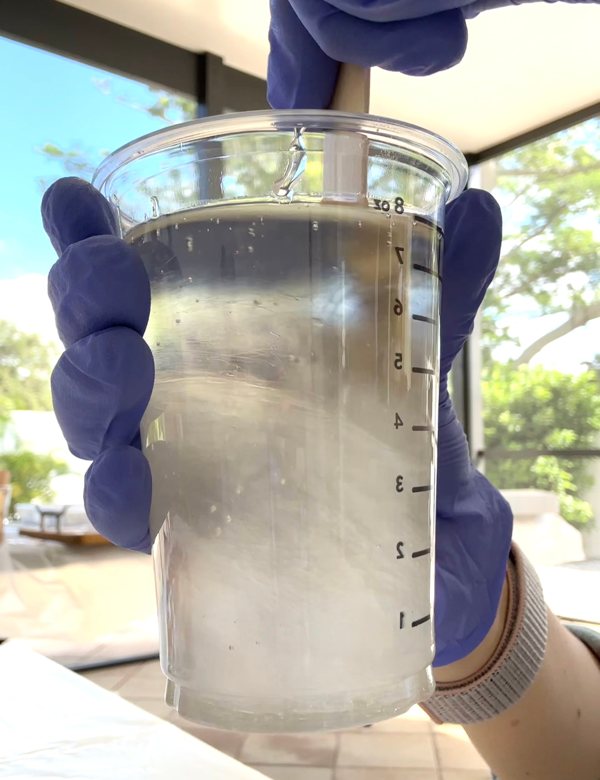
When mixing your resin batch, you want to mix the resin and hardener thoroughly yet efficiently. Follow the manufacturer's recommended mixing time to get ideal results from your epoxy, both in strength and appearance.
Mistake #5: Reusing mixing containers to make additional batches.
The final mistake in our list is also the easiest one to avoid. Oftentimes, epoxy users will attempt to reuse mixing containers, whether for convenience or to save a couple dollars. However, reusing mixing containers for additional batches of epoxy resin is generally discouraged due to the risk of contamination and improper curing.
Residual epoxy can tarnish new batches.
After mixing, any residual epoxy left in the container from a previous batch may have partially cured or reacted, and even tiny amounts can interfere with a fresh batch's curing process. This can lead to uneven curing, with some parts of the resin mixture remaining tacky or not hardening properly, compromising the strength and integrity of the finish.
Furthermore, remnants of partially cured resin can introduce unwanted impurities and air bubbles into the new mixture, affecting its clarity and strength. These issues are particularly problematic in applications where a clear, smooth finish is desired, such as in casting or coating.
Additionally, the presence of hardened resin pieces can create physical defects in the final product, such as bumps or irregularities on the surface.
Avoiding this issue:
These problems can be easily avoided by simply using clean, new containers for each epoxy resin mix. This is the only reliable way to ensure the best possible results and maintain the quality of your work.
Additional Resources
Here are some additional resources you may find useful:
- 5 major missteps newcomers make when shopping for epoxy
- The 4 biggest mistakes people make when measuring epoxy
- Epoxy resin basics: How to apply multiple layers
Have Questions? Want Advice? We're Here to Help!
If you have any questions about epoxy resin, or if you'd like assistance in planning an epoxy project, please reach out to us at UltraClear Epoxy—our epoxy experts are ready to assist!
You can contact us via phone or email here. During business hours, you can also text chat online with one of our resin specialists by clicking the Help button at the bottom of your screen.
In our online store, you'll find a variety of useful tools and supplies, ideal for resin projects, plus our award-winning UltraClear Bar & Table Top Epoxy and our UltraClear Deep Pour Epoxy.
UltraClear Epoxy—Trusted by over 1 Million+ Happy Customers

