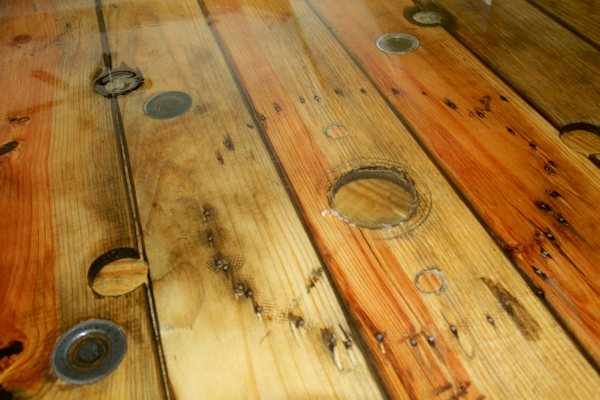
While epoxy resin is well known for its durability, glossy finish, and incredible resistance to wear, even the toughest surfaces can still become damaged over time. Scratches, chips, discoloration, and other imperfections can appear due to heavy use or accidental mishaps. Fortunately, with the right tools and techniques, most issues with epoxy surfaces can be repaired and restored to their original beauty.
In this guide, we’ll walk you through the most common types of damage and how to fix them step by step.
Contents |
|
Common Types of Epoxy Surface Damage |

Common Types of Epoxy Surface Damage
Whether due to user error, low-quality resin, or simply wear and tear from heavy usage, there are several types of damage that might develop in epoxy resin.
-
Scratches and Scuffs: Minor surface imperfections caused by everyday use.
- Chips and Dents: Deeper damage often resulting from dropped objects or impacts.
- Cloudiness or Haze: Usually caused by moisture or improper curing.
- Bubbles: Air sometimes becomes trapped beneath the surface of the epoxy.
- Yellowing or Discoloration: A result of prolonged UV exposure or aging.

Step-by-Step Repair Processes
Fix #1: Mending Scratches and Scuffs
Minor scratches can form on epoxy through frequent use, especially in high-traffic areas.
What You’ll Need:
- Fine-grit sandpaper (e.g., 600-2000 grit)
- Polishing compound
- Soft cloth or buffing pad
Steps:
-
Clean the Surface:
- Use a damp microfiber cloth or lint-free cloth with a small amount of mild soap to clean the scratched area.
- Ensure no debris or dust remains, as these can worsen the scratches during repair.
-
Sand the Surface:
- Begin with a fine-grit sandpaper (e.g., 800-grit) and sand the scratched area in a circular motion. If scratches are deep, start with a coarser grit (e.g., 400-grit) and move to finer grits gradually.
- Keep the sanding even to avoid creating an uneven surface.
-
Polish the Surface:
- After sanding, apply a polishing compound designed for epoxy surfaces.
- Use a soft cloth or a buffing pad to rub the polish in circular motions until the surface regains its shine.
-
Re-Coat if Necessary:
- For deep scratches, you may need to apply a thin layer of fresh epoxy (such as UltraClear Bar & Table Top Epoxy). Sand the area lightly beforehand to help the new epoxy adhere.


Fix #2: Repairing Chips and Dents
Dents and chipped edges are unsightly and can compromise the durability of the epoxy surface. They often result from impacts or heavy use.
What You’ll Need:
- Epoxy resin (e.g., UltraClear Bar & Table Top Epoxy)
- Mixing cups and stir sticks
- Painter’s tape
- Sandpaper
Steps:
-
Clean the Area:
- Wipe the chipped area with a damp cloth and isopropyl alcohol to remove dust and oils.
-
Prepare a Mold (If Needed):
- For larger chips, create a temporary mold around the edge using flexible plastic or painter's tape. This will help shape the epoxy to match the original design.
-
Mix and Apply Epoxy:
- Mix a small batch of UltraClear Bar & Table Top Epoxy.
- Carefully fill the chipped area, ensuring the epoxy adheres to the existing surface.
-
Smooth and Level:
- Use a tool like a popsicle stick to level the epoxy and shape it to match the surrounding area.
-
Sand and Finish:
- Once the epoxy has cured, sand it to match the texture of the rest of the surface.
- Polish the area to restore the shine.

Fix #3: Restoring Cloudy or Hazy Surfaces
A cloudy or milky finish is typically caused by moisture contamination, air bubbles, or improper curing.
What You’ll Need:
- Fine-grit sandpaper
- Polishing compound
- Heat gun (optional)
Steps:
-
Determine the Cause:
- Identify whether the cloudiness is due to moisture, bubbles, or incomplete curing.
-
Reheat the Surface:
- If moisture is the issue, you can try gently heating the surface with a heat gun. This may evaporate the trapped moisture and clear the resin.
-
Polish the Surface:
- For minor cloudiness, use a polishing compound and buff the area with a soft cloth or a variable-speed polisher.
- For minor cloudiness, use a polishing compound and buff the area with a soft cloth or a variable-speed polisher.
-
Re-Coat the Surface:
- If cloudiness persists, lightly sand the area and apply a fresh layer of epoxy.
- Use UltraClear Bar & Table Top Epoxy for its clarity and durability.

Fix #4: Removing Bubbles
Bubbles can form during the mixing or pouring process and may remain trapped after curing if not addressed. There are two methods for bubble removal, depending on the state of the epoxy.
Dealing with Air Bubbles in Uncured Epoxy
What You’ll Need:
-
A heat gun or propane torch
Steps to Remove Bubbles:
- Choose Your Tool: Use a propane torch or a heat gun. A torch is preferred for its precise yet even heat distribution, but a heat gun is a safer alternative for those uncomfortable with open flames.
-
Hover Over the Surface:
- Hold the torch or heat gun a few inches above the epoxy surface.
- Move it back and forth in smooth, continuous motions across the entire area.
- Ensure even heating without lingering too long in one spot.
-
Repeat the Process:
- After your first pass, wait 10 minutes to allow additional bubbles to rise to the surface.
- Perform a second pass with the torch or heat gun.
-
Check Your Work:
- Lower your eye level to the surface and inspect it at a sharp angle to detect any remaining bubbles. The reflection of light will make them easier to spot.
This method works best when performed immediately after pouring, before the epoxy begins to cure.
Important Tips:
- Avoid Overheating: Do not hover over a single area for more than a second. Prolonged heat exposure can cause the epoxy to overheat, leading to surface imperfections.
- Keep the Flame Off the Resin: The heat alone is sufficient to pop bubbles—direct flame contact can scorch the surface.
- Avoid Using Hair Dryers: Hair dryers or similar appliances blow air too forcefully, which can introduce dust and debris into your epoxy.
Fixing Air Bubbles in Cured Epoxy
If the epoxy has hardened and bubbles are still present, the repair method depends on the depth of the bubbles.
For Surface-Level Bubbles:
-
Lightly Sand the Surface:
- Use fine-grit sandpaper (e.g., 320-grit) to remove the top layer containing bubbles.
-
Clean with Acetone:
- Wipe the sanded area with acetone to remove dust and debris. Allow it to evaporate completely (about 30 minutes).
-
Apply a Seal Coat:
- Pour a thin seal coat to fill in the blemishes. Let it cure for 4–6 hours.
-
Add a New Flood Coat:
- Pour a fresh flood coat over the entire surface to restore a smooth, glossy finish.
For Deep Bubbles:
-
Sand Heavily:
- Sand down the epoxy until all the bubbles are completely removed. This may require removing most of the existing flood coat.
-
Clean with Acetone:
- Wipe the surface with acetone and wait for it to evaporate.
-
Apply Two Seal Coats:
- Start with a thin seal coat to ensure the surface is fully prepared. Let it cure for 4–6 hours.
- Apply a second seal coat and allow another 4–6 hours of curing.
-
Pour a New Flood Coat:
- Finish with a full flood coat over the entire surface, ensuring a smooth and consistent appearance.
Why Recoat the Entire Surface?
Spot repairs can leave visible transitions and uneven surfaces. Applying a full flood coat ensures a seamless finish across the entire project.

Fix #5: Addressing Yellowing or Discoloration
What You’ll Need:
- UV-resistant epoxy resin (e.g., UltraClear Bar & Table Top Epoxy)
- Sandpaper
- Polishing compound
Steps:
- Sand the discolored area to remove the yellowed layer of resin.
- Clean the surface thoroughly to remove sanding dust.
- Apply a fresh layer of UV-resistant epoxy resin to prevent future yellowing.
Preventing Future Damage
- Use Coasters and Pads: Protect surfaces from scratches, heat, and moisture.
- Clean Regularly: Wipe down epoxy surfaces with a soft cloth and mild detergent.
- Avoid Harsh Chemicals: These can degrade the epoxy over time.
- Choose UV-Resistant Epoxy: Products like UltraClear Bar & Table Top Epoxy are designed to resist yellowing from UV exposure.

Fixing Epoxy Is Not as Hard as It Seems
Repairing and restoring damaged epoxy surfaces doesn’t have to be daunting. With the right tools, techniques, and high-quality products like UltraClear Deep Pour Epoxy and UltraClear Bar & Table Top Epoxy, you can breathe new life into your epoxy creations. Whether you’re fixing a scratch or addressing more significant damage, a little effort goes a long way in maintaining the beauty and durability of your epoxy surfaces.
Have questions? Want advice? Contact us!
If you have any questions about epoxy resin, or if you'd like assistance in planning an epoxy project, please reach out to us at UltraClear Epoxy—our epoxy experts are ready to assist!
You can contact us via phone or email here. During business hours, you can also text chat online with one of our resin specialists by clicking the Help button at the bottom of your screen.
In our online store, you'll find a variety of useful tools and supplies, ideal for resin projects, plus our award-winning UltraClear Bar & Table Top Epoxy and our UltraClear Deep Pour Epoxy.


