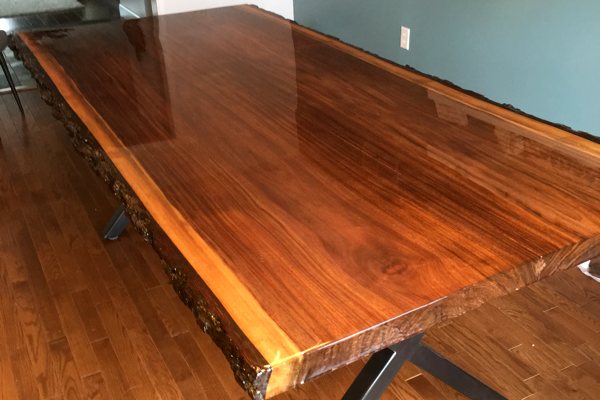
Epoxy finishes have become a go-to solution for creating stunning, durable surfaces—whether on table tops, bar counters, river tables, or intricate art pieces. Their crystal-clear finish and tough-as-nails durability make them ideal for both beauty and function.
However, not all epoxy projects turn out as expected, especially when using lower-grade or budget epoxy. Mistakes during mixing, pouring, or curing can lead to unsightly or even unusable results. Fortunately, with the right approach, most issues are fixable—and even better, preventable.
In this comprehensive guide, we'll cover common epoxy problems categorized by their typical causes. We'll detail what each issue is, how it happens, what tools or supplies are needed to fix it, and how you can prevent it in the future. Plus, we'll explain why opting for a high-quality product like UltraClear Epoxy can make all the difference.


Problem-by-Problem Fixes and Prevention
In this section, we'll go over a wide array of problems that can occur when using epoxy, including why they happen and how to deal with them.
These issues are divided into sections based on their typical causes.

Mixing and Measurement Errors
#1: Incomplete Curing (Tacky or Soft Surface)
What it is: A situation in which the epoxy remains sticky, rubbery, or soft well past its expected cure time.
Why it happens: This issue commonly occurs when the ratio of resin and hardener is off. It can also be due to inadequate mixing or the curing environment being too cold for the chemical reaction to fully complete.
How to fix:
- Scrape away the tacky epoxy using a plastic scraper.
- Clean the surface with denatured alcohol to remove any residue.
- Once dry, lightly sand the surface with 220-grit sandpaper to promote adhesion.
- Carefully measure a new batch of epoxy—marked mixing containers are great here—and mix it for 3 to 5 minutes this time carefully measure the resin and hardener using marked measuring cups, mix for 3–5 minutes scraping the sides and bottom constantly—and reapply.
Supplies Needed: Plastic scraper, denatured alcohol, 220-grit sandpaper, properly mixed epoxy.
Prevention: Always measure using volume-marked tools (not by eye or weight), mix thoroughly, and work in a space between 70°F–80°F—ideally 75°F. Warmer environments help accelerate and complete curing.
#2: Resin Not Hardening After Suggested Time
What it is: This is when the epoxy remains in a liquid or gel-like state beyond the stated cure time.
Why it happens: This problem is typically caused by mixing errors, incorrect ratios, or curing in cold temperatures. Sometimes it can also stem from contaminated resin or hardener.
How to fix:
- Use paper towels to absorb any liquid epoxy, then wipe with denatured alcohol to clean.
- For partially hardened resin, gently heat the area with a heat gun to stimulate curing.
- If there’s no improvement, remove the affected resin entirely, clean, and re-pour with a properly mixed and measured batch at the correct ambient temperature.
Supplies Needed: Paper towels, denatured alcohol, heat gun, replacement epoxy.
Prevention: Use only fresh epoxy with correct ratios, mix thoroughly, and work in a temperature-controlled space above 70°F.
#3: Patchy or Cloudy Epoxy
What it is: In some cases, the cured epoxy can end up patchy, soft, or cloudy in some areas.
Why it happens: This occurs when resin and hardener are not mixed well enough to trigger full curing. Incomplete mixing leaves portions of the epoxy unable to harden.
How to fix:
- Sand the surface with 120–220 grit to remove soft or cloudy areas.
- Wipe with denatured alcohol.
- Mix a new batch properly—stir slowly for 3–5 minutes, scraping the container sides and bottom—and pour a new thin coat.
Supplies Needed: Sandpaper, clean cloth, denatured alcohol, well-mixed epoxy.
Prevention: Take your time to mix epoxy carefully, scrape the sides of your mixing container while mixing, and ensure a uniform appearance before pouring.

Problems Caused by an Inadequate Environment
#4: Cloudy or Hazy Finish
What it is: This is when the epoxy finish exhibits a milky or foggy appearance that makes the surface look dull instead of clear and glassy.
Why it happens: Typically, this is caused by moisture contamination in the resin or substrate, or by pouring in high humidity conditions.
How to fix:
- Lightly sand the surface with 220-grit sandpaper to remove the cloudy layer.
- Clean with denatured alcohol to ensure all dust and contaminants are gone.
- Pour a fresh thin layer of UltraClear Bar & Table Top Epoxy over the surface, ensuring your working conditions are dry.
Supplies Needed: Sandpaper, denatured alcohol, clean cloth, properly mixed epoxy.
Prevention: Keep your epoxy environment below 60% humidity. This can be controlled with a dehumidifier. Store your materials in a dry place and avoid pouring during or after rainstorms or in unconditioned rooms.

#5: Sticky or Oily Surface Residue
What it is: A greasy or oily film remains after curing.
Why it happens: This is often a symptom of amine blush—an oily residue caused by moisture and carbon dioxide reacting with curing epoxy.
How to fix:
- Wipe the surface thoroughly with a solution of warm water and mild dish soap, then rinse and dry.
- Lightly sand the surface and re-coat with UltraClear Bar & Table Top Epoxy if necessary.
Supplies Needed: Warm soapy water, sponge, clean towel, sandpaper.
Prevention: Avoid applying epoxy in high humidity or cold temperatures. Keep the space well-ventilated and clean.
#6: Surface Blushing (Amine Blush)
What it is: A waxy or oily residue forming on the surface of cured epoxy.
Why it happens: Caused by a reaction between the hardener and atmospheric moisture and carbon dioxide.
How to fix:
- Wash the surface with warm, soapy water to remove the blush.
- Rinse, dry, and sand before applying a coat of UltraClear Bar & Table Top Epoxy.
Supplies Needed: Soap and water, sponge, sandpaper, clean cloth.
Prevention: Use epoxy in controlled environments (65°F–80°F—ideally 75°F) with humidity under 60%. Keep containers sealed when not in use.

#7: Incomplete Curing Due to Cold Temperatures
What it is: Epoxy that remains soft or sticky due to low ambient temperatures during the curing phase.
Why it happens: Cold temperatures slows the chemical reaction of epoxy, which can prevent complete curing.
How to fix:
- If partially cured, apply gentle heat using a space heater at a safe distance to warm the area to 70°F+. Monitor for cure progress.
- If curing has failed entirely, remove the epoxy and re-pour in a temperature-controlled area.
Supplies Needed: Heater, thermometer, replacement epoxy (e.g., UltraClear Bar & Table Top Epoxy or Deep Pour Epoxy.
Prevention: Always work in a space with consistent temperatures above 70°—ideally 75°F. If needed, warm the resin and hardener in warm water before mixing.
#8: Yellowing Over Time
What it is: A discoloration that turns clear epoxy to a yellow or amber tone.
Why it happens: This is often caused by UV exposure, using low-quality epoxy, or prolonged heat.
How to fix:
- Lightly sand the surface and apply a UV-resistant epoxy layer like UltraClear Bar & Table Top Epoxy. For further protection from UV—particularly for outdoor projects—we recommend a applying an extra topcoat of UV-resistant urethane.
- For deep discoloration, remove the epoxy and reapply.
Supplies Needed: UV-stable epoxy, sandpaper, clean cloth.
Prevention: Use high-quality, UV-resistant epoxy. Avoid placing epoxy table tops in direct sunlight by providing shade or shelter or keeping it indoors.
#9: Crystallization of Stored Resin
What it is: This is when the resin has turned cloudy and hard like sugar crystals, typically while still stored in its original bottle.
Why it happens: This occurs when the epoxy has been stored in a space with cold or fluctuating temperatures, causing the resin to crystallize.
How to fix:
- This is easily amended by placing the resin container in a warm water bath (~120°F) and stir occasionally until it returns to a clear liquid.
Supplies Needed: Warm water bath, heat-safe container, stirring stick.
Prevention: Store resin in a dry, consistent-temperature location (above 60°F).

Application Technique Mistakes
#10: Air Bubbles in the Epoxy
What it is: Trapped air bubbles that visibly mar the surface of cured epoxy.
Why it happens: Air is often induced into the epoxy during mixing or when applied to an unsealed substrate, which then releases air from its porous surface.
How to fix:
- For surface-level bubbles, sand lightly then wipe the surface with acetone. Allow it dry fully and re-coat the entire surface with high-quality epoxy. Learn more here.
- For deep bubbles, sand thoroughly then wipe the surface with acetone and let it fully dry. Re-coat it with a high-grade epoxy of the same type (e.g., UltraClear Bar & Table Top Epoxy).
Supplies Needed: Heat gun or torch (for prevention), sandpaper, acetone, clean cloth.
Prevention: Mix slowly to avoid introducing air, seal wood surfaces first, and use a heat gun or torch immediately after pouring your epoxy to remove bubbles.
#11: The Epoxy Developed an Orange Peel Texture
What it is: This is when your epoxy exhibits a dimpled, uneven surface, often resembling an orange peel.
Why it happens: This side effect often appears after applying too thin a coat or not allowing proper leveling.
How to fix: Sand the surface smooth and pour another thin flood coat of epoxy of UltraClear Bar & Table Top Epoxy.
Supplies Needed: Sandpaper, clean cloth, fresh epoxy.
Prevention: Pour enough epoxy to fully cover the surface. UltraClear Bar & Table Top Epoxy will self-level to 1/8" thick layers. Make sure your surface is level before application.
#12: The Surface of the Epoxy Is Cracking
What it is: When your epoxy finish has visible cracks at the surface.
Why it happens: This is caused by overpouring or thermal stress, or by physical impact (such as from dropping a very heavy item on it).
How to fix:
- Sand the area, then remove any dust
- Pour a new flood coat using UltraClear Bar & Table Top Epoxy.
Supplies Needed: Sandpaper, vacuum or cloth, UltraClear Bar & Table Top Epoxy.
Prevention: Never pour more than recommended depth per layer (e.g., 1/8" for Bar & Table Top Epoxy).

#13: Bubbles Have Appeared Around Embedded Objects
What it is: This is visual defect in which there are clusters of air bubbles around items embedded in epoxy.
Why it happens: Occasionally, items intended for embedment contains pockets of air due to their shape or a porous exterior. If such items are not properly sealed before epoxy application, the air may be displaced during curing, becoming trapped within the resin finish.
How to fix:
- Use a heat gun or torch to burst the air bubbles during the first 30–60 minutes. If needed, then sand and re-coat.
- If the epoxy has hardened, you'll need to sand it down to bubble level, clean it acetone, then let it dry and finally apply a new coating of UltraClear Bar & Table Top Epoxy.
- See our bubble removal guide for more details.
Supplies Needed: Heat gun, sandpaper, clean cloth.
Prevention: Seal any objects you'll be embedding with a light coat of epoxy or Mod Podge before flood coat application. Our guide to embedding techniques provides different ways to handle this.
#14: Ripples, Scorch Marks, or a Fish-Eye Texture in the Epoxy
What it is: This is when the epoxy surface becomes rippled, scorched, or develops fish eyes due to excessive use of a torch or heat gun.
Why it happens: Applying too much heat too close or for too long breaks the epoxy's surface tension or burns the top layer.
How to fix:
- Lightly sand down the damaged area with 220-grit sandpaper to remove burn marks or distortions.
- Clean thoroughly with isopropyl alcohol, then let it dry.
- Apply a new flood coat using UltraClear Bar & Table Top Epoxy.
Supplies Needed: Sandpaper, isopropyl alcohol, clean cloth, UltraClear Bar & Table Top Epoxy.
Prevention: During bubble removal, hold your torch or heat gun 6–8 inches above the surface and keep it moving. Perform smooth passes and avoid prolonged heat application—linger no more than a second over any area.
#15: The Epoxy Has Started Curing in the Mixing Container
What it is: This is when epoxy rapidly begins to cure inside the mixing container and becomes too thick to pour.
Why it happens: During mixing, epoxy gradually begins curing and generates heat. Excessive mixing or waiting too long to pour it can accelerate this reaction.
How to fix:
- If already thickened in the cup, you'll need to discard the batch and mix a new one in a fresh mixing container.
- Do not attempt to pour the partially cured epoxy or reuse the container of the spoiled batch.
Supplies Needed: Epoxy, clean mixing container, and tools for stirring.
Prevention: Immediately pour the epoxy after mixing it adequately to prevent it from overheating in the container.

Surface Preparation and Substrate Issues
#16: The Epoxy Finish Is Peeling or Delaminating
What it is: This problem is when cured epoxy is separating from the substrate in sheets or flakes.
Why it happens: It's difficult to know for sure, but this is likely due to inadequate surface prep, contamination, or applying over an incompatible substrate.
How to fix:
- Sand off any loose epoxy.
- Clean and degrease the surface thoroughly (we recommend using acetone); let it fully dry.
- Reapply using high-quality epoxy and after performing proper surface prep.
Supplies Needed: Sandpaper, degreaser or acetone, clean cloth, epoxy.
Prevention: Always sand and clean surfaces before applying epoxy. Ensure they're dry and free of oil, dust, and wax.
#17: The Epoxy Didn't Bond to the Substrate in Some Areas
What it is: This is when the epoxy fails to bond fully, leaving bald or uneven spots.
Why it happens: Often, this is caused by residues such as oil, wax, or silicone being present on the surface during epoxy application.
How to fix: Sand the area to expose clean substrate. Clean with acetone or isopropyl alcohol. Let dry, then reapply epoxy.
Supplies Needed: Sandpaper, acetone or alcohol, lint-free cloth.
Prevention: Degrease and wipe surfaces before every epoxy coat. Avoid touching with bare hands after cleaning. See our guide to surface preparation for more advice.

#18: The Epoxy Isn't Bonding at All to the Substrate
What it is: When the epoxy pulls away completely from the substrate and doesn't bond to it.
Why it happens: Some plastics (e.g., silicone), oily woods, and glossy finishes resist adhesion and prevent the resin from bonding with the substrate during curing.
How to fix:
- Sand the surface to add texture. Use a bonding primer if needed.
- Reapply epoxy after prepping.
Supplies Needed: Sandpaper, bonding primer (if required), clean cloth, epoxy.
Prevention: Always test unfamiliar materials beforehand, and scuff glossy surfaces before coating. Learn more about compatible substrate materials here.
#19: Dust, Hair, or Other Particles Are Stuck in the Resin
What it is: This is any time whenever tiny particles or hair get embedded into the epoxy as it cures.
Why it happens: Not having a dust-free environment or failing to cover the curing project can lead to stray particle landing on the resin surface and becoming embedded within it.
How to fix:
- Allow the epoxy to finish curing, then sand it with 320-grit paper.
- Clean the surface and let it dry.
- Then apply a fresh topcoat of UltraClear Bar & Table Top Epoxy.
Supplies Needed: Sandpaper, clean cloth, UltraClear Bar & Table Top Epoxy, dust cover (plastic sheeting or box).
Prevention: Cover the project immediately after pouring to prevent circulating dust from landing on the epoxy, and keep the workspace as clean as possible.

Compatibility and Quality Issues
#20: Embedded Objects Look Discolored
What it is: This is when items such as photos, leaves, or fabrics darken or lose clarity once encased.
Why it happens: This occurs when unsealed items either absorb the epoxy, resulting in a shriveled "wet" look or in ink bleeding. In rare cases, there may be a chemical present that reacts to the epoxy causing discoloration and potentially other issues.
How to fix: Unfortunately, once embedded and cured, discoloration cannot be reversed. Future layers may obscure it, but not fix it.
Supplies Needed: New clean version of the object, epoxy.
Prevention: Always seal porous or colored items with Mod Podge or a spray sealant before embedding. Let them dry fully.
#21: Resin Is Getting Too Hot While Mixing or Curing
What it is: When the epoxy suddenly becomes hotter and begins to cure rapidly in the container or after application, sometimes emitting smoke.
Why it happens: Usually this is from attempting to prepare a batch that is too large, pouring too thick of a layer, or using low-grade epoxy that advertises itself as fast-curing.
How to fix: If safe, move the container outdoors. Let it cool. Discard the overheated batch safely. Never touch hot containers.
Supplies Needed: A safe disposal method.
Prevention: Mix smaller batches, especially in warm rooms. If a thick layer is needed, use a deep pour formula like UltraClear Deep Pour Epoxy.

The Hidden Costs of Budget Epoxies
These days in the epoxy market, there are many off-brand resin products that advertise high quality at a low price. At first glance, these budget epoxies might seem like a smart way to save money, especially for large projects. But the hidden costs of using low-cost, typically imported epoxy resins become apparent fast.
The first major concern is quality control. Overseas manufacturers are usually chosen for their lax regulation, allowing subpar components to be used during production. The absence of rigorous testing standards like those adhered to by U.S.-based producers leads to inconsistencies in resin-to-hardener ratios, contamination, and flawed curing properties. This can result in poor finishes, soft spots, and yellowing over time.
Secondly, many budget epoxies contain unknown or poorly disclosed additives. Some of these can pose significant health hazards through skin contact or noxious fumes. Furthermore, without proper documentation and certification, there's little assurance of safety when working with these materials—particularly indoors or in poorly ventilated spaces.
The last major issue is support and reliability. With budget epoxies, customer service is often limited or nonexistent, leaving you without help if your project goes wrong.
Learn more about these issues here—or read below to find out why high-grade epoxies such as those from UltraClear can provide you long-term savings and peace of mind.

UltraClear Epoxy: Premium Epoxy Resins Made in the U.S.A.
UltraClear Epoxy products are 100% made in the U.S.A., with transparent ingredient sourcing and consistent formulation standards. Our UltraClear Bar & Table Top Epoxy, for example, offers superior clarity and a self-leveling formula that resists scratches and yellowing. Not only do we not compromise on formulation, but every batch also undergoes significant quality assurance, to deliver the best possible product for our users.
Our epoxies are easy to clean, highly durable, and ideal for projects where longevity and appearance matter.
You can find our UltraClear Epoxy products on the following pages:
- UltraClear Bar & Table Top Epoxy—Our most durable epoxy finish, with a crystal-clear, self-leveling coating that cures smooth and strong.
- UltraClear Deep Pour Epoxy—Our deep casting resin designed for thick layers of up to 2 inches each. Use this if you need a deep, clear finish.
- UltraClear Art & Craft Epoxy—A specialized epoxy for smaller projects needing nuanced pours or layering.
Want to speak with one of our epoxy experts? Visit our Contact Us page to learn how!

FAQs: Fixing and Preventing Epoxy Problems
Question #1: How can I remove sticky or tacky epoxy from a table top?
Scrape off the soft areas using a plastic scraper, then wipe the surface with denatured alcohol. Lightly sand and reapply a thin, properly mixed layer of UltraClear Bar & Table Top Epoxy.
Question #2: Can I fix surface bubbles after epoxy has cured?
Yes. Sand down the bubbled surface with 220-grit sandpaper, clean thoroughly using acetone, and let it fully dry. Afterward, apply a fresh flood coat of UltraClear Bar & Table Top Epoxy.
Question #3: What’s the best temperature range for working with epoxy?
Most epoxies, including all UltraClear Epoxies, perform best between 70°F and 80°F—ideally 75°F. Avoid working in humid or cold conditions.
Learn more about achieving a perfect cure here.
Question #4: My embedded objects changed color. Can I prevent this?
Seal porous or reactive items with Mod Podge or a clear acrylic spray before embedding. Use UltraClear Art & Craft Epoxy for precision projects.
Question #5: How do I know if epoxy has fully cured?
Fully cured epoxy will be hard to the touch, non-tacky, and free from odor. This usually takes 72 hours for UltraClear products under ideal conditions. Epoxy that is hard at the surface will continue to harden for around 2 weeks internally until it has reached peak strength.

Have Questions? Want Advice? We're Here to Help!
If you have any questions about fixing or maintaining epoxy resin, or if you'd like assistance in planning an epoxy project, please reach out to us at UltraClear Epoxy—our epoxy experts are ready to assist!
You can contact us via phone or email here. During business hours, you can also text chat online with one of our resin specialists by clicking the Help button at the bottom of your screen.
In our online store, you'll find a variety of useful tools and supplies, ideal for resin projects, plus our award-winning UltraClear Bar & Table Top Epoxy and our UltraClear Deep Pour Epoxy.


