Epoxy resin is widely used in art, furniture making, and construction due to its remarkable durability, clarity, and protective qualities. To get that crystal-clear finish, though, you'll need to fully understand the mixing and pouring steps of the epoxy process.
In this comprehensive guide, you'll find all the necessary information—from understanding batch sizes to performing a flawless pour—that will ensure your projects turn out exactly as planned.

Initial Prep: Acquiring the Essential Materials and Tools
To get started, you'll need some necessary supplies. These items are essential for almost any project.
-
Epoxy Resin: Choose the appropriate UltraClear product based on your project:
- UltraClear Bar & Table Top Epoxy for smooth, high-gloss coatings.
- UltraClear Deep Pour Epoxy for thicker applications.
- UltraClear Art & Craft Epoxy for detailed, smaller-scale projects.
-
Measuring Cups or Graduated Containers: For precise measurement of resin and hardener. You'll find 1-quart and 5-quart containers in our store. You'll combine the epoxy components in these.
-
Mixing Sticks: We have resusable plastic stir sticks in our store. Some users prefer wood stir sticks
- Protective Gear: Be safe by wearing nitrile gloves, safety goggles, and a respirator mask when working with epoxy.
- Surface Preparation Materials: Lint-free cloths, isopropyl alcohol, and plastic sheeting for workspace protection.
- A Heat Gun or Torch: To remove air bubbles from the poured epoxy.
-
(Optional) Power Drill with Mixing Bit: A power drill with an attached mixing bit can make large epoxy batches much easier to prepare.

Before You Begin: Understanding Epoxy Batch Sizes
The size of your epoxy batch is dictated by your project scale and the working time required. Here are a few key points to consider:
- Project Scale: Larger projects such as river tables or expansive art panels will require a larger batch. For smaller projects like coasters or jewelry, a small batch is sufficient.
- Workability: Epoxy resin begins to cure as its being mixed, so larger batches may result in a shorter working window. For resins with a smaller working time like table top epoxy, it's important to be mindful of this. Small batches provide more control and reduce waste, as needed.
- Storage and Safety: Only mix what you need at any point during your project. Overmixing or preparing too large a batch increases the risk of curing inconsistencies and wasted materials.
Understanding these factors helps you plan your resin mix to match your project needs, ensuring optimal workability and minimal waste.

A Step-by-Step Guide to Mixing Epoxy Resin
If you want a proper cure, you need to mix the epoxy right. It's not difficult, but it is particular. Just follow these steps carefully:
Step #1: Prepare Your Workspace and Materials
- Clean and Level: Ensure your workspace is clean, dust-free, and level. Cover surfaces with plastic sheeting to catch any spills.
- Tape Off Edges: For projects like table tops, use painter’s tape to create a temporary barrier and define the area.
- Level the Surface: Confirm the workspace is perfectly level to achieve an even spread of resin.
- Personal Safety: Wear protective gear including gloves, goggles, and a respirator, especially when working indoors.
- Temperature Control: Work in an environment maintained at around 70°F to 80°F—ideally 75°F—to ensure proper curing.
Step #2: Measuring Your Epoxy Precisely
- Read Instructions: Carefully review the product guidelines for the recommended resin-to-hardener ratio. For UltraClear products, the ratio is specified (e.g., 1:1 for UltraClear Bar & Table Top Epoxy or 2:1 for UltraClear Deep Pour Epoxy).
- Use Precise Tools: Use a graduated mixing cup to measure each component accurately. Measure by volume—not weight—and avoid estimating quantities to prevent curing issues.
Step #3: Mixing Process
- Stir Thoroughly: Mix slowly and methodically for 3 to 5 minutes, scraping the sides and bottom of the container to ensure all material is evenly blended.
- Avoid Excess Air: Stir gently to minimize the introduction of air bubbles. A well-mixed batch should be uniform in color and consistency.
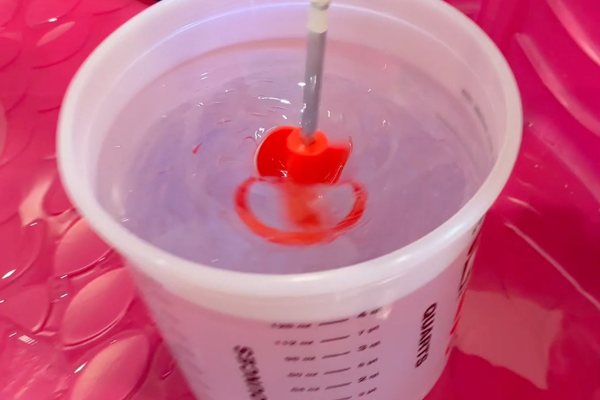
- Mixing Tools: For larger batches, using a power drill with a mixing bit can make it much faster and easier to fully blend the components together. Be careful not to mix too aggressively, as this may introduce unwanted air bubbles. For smaller projects, stir sticks are sufficient.
Want more advice? Avoid these common mistakes while mixing your epoxy resin.
Step #4: Monitor and Adjust
- Work Quickly: Once mixed, begin pouring immediately, as the epoxy will start to cure. This is especially important for fast-curing resins such as UltraClear Bar & Table Top Epoxy.
- Temperature Checks: If the resin begins to thicken unexpectedly, check your ambient temperature to ensure it remains within the ideal range.

A Step-by-Step Guide to Pouring Epoxy Resin
Executing a clean pour is essential for a smooth, professional finish. Follow these steps once you've mixed up your epoxy batch:
Step #1: Pouring the Epoxy
- Pour in Stages: For large or deep projects, consider pouring in layers. This approach helps manage the exothermic reaction and reduces the risk of curing issues.
- Controlled Flow: Slowly pour the mixed epoxy onto the surface, starting from the center and working outward. For table top projects, ensure the resin spreads evenly to cover the entire area.
- Use Tools if Needed: Employ a spatula or a spreader to guide the epoxy into thin, uniform layers if required.
Step #3: Removing Air Bubbles
- Immediate Action: After pouring, use a heat gun or torch to gently pass over the surface. This will release trapped air bubbles, ensuring a smooth finish.
- Multiple Passes: For thick pours, it may be necessary to repeat this process as additional bubbles may form.
Step #4: Curing Process
- Protect the Pour: Cover your project with a dust-free tent or a clean plastic cover to prevent debris from settling on the epoxy while it cures.
- Allow Adequate Time: Follow the product’s recommended curing time. For instance, UltraClear Bar & Table Top Epoxy typically cures within 72 hours, while thick layers of UltraClear Deep Pour Epoxy may be usable after 72 hours but require a longer period for complete hardening.
- Avoid Disturbance: Once poured, do not move or disturb the project until the epoxy is fully cured to prevent imperfections.

Why Choose High-Quality Epoxy?
Choosing a high-quality epoxy resin is critical for achieving a clear, durable finish. Low-cost resins often suffer from issues like yellowing, uneven curing, and reduced durability; they can even be unsafe, as they're often imported from regions with weak health and safety regulations.
UltraClear Epoxy products, on the other hand, are manufactured in the USA under strict quality standards. They offer:
- Superior Clarity: Maintains a crystal-clear finish that does not yellow over time.
- Reliable Curing: Ensures even curing with a robust, long-lasting surface.
- Enhanced Durability: Resists scratches, heat, and moisture, making it ideal for high-use projects.
- Consistent Performance: Provides peace of mind with products that perform reliably on every project.
Investing in UltraClear Bar & Table Top Epoxy, UltraClear Deep Pour Epoxy, or UltraClear Art & Craft Epoxy not only enhances the visual appeal of your work but also ensures an extensive lifespan and the best in durability.

Just Taking Your Time Will Lead to Better Results
Mixing and pouring epoxy resin may seem challenging at first, but with careful preparation, precise measurement, and proper technique, you can achieve professional-grade results.
By understanding batch sizes, following detailed mixing and pouring steps, and using high-quality products like UltraClear Epoxy, you'll set the stage for successful, durable projects.
Whether you’re coating a wooden table top, crafting intricate art pieces, or creating deep, layered designs, sticking with these guidelines will help you produce clear, long-lasting epoxy creations while avoiding common mistakes.
Have Questions? Want Advice? We're Here to Help!
If you have any questions about mixing or pouring epoxy resin, or if you'd like assistance in planning an epoxy project, please reach out to us at UltraClear Epoxy—our epoxy experts are ready to assist!
You can contact us via phone or email here. During business hours, you can also text chat online with one of our resin specialists by clicking the Help button at the bottom of your screen.
In our online store, you'll find a variety of useful tools and supplies, ideal for resin projects, plus our award-winning UltraClear Bar & Table Top Epoxy and our UltraClear Deep Pour Epoxy.


