Welcome to our guide on how to make glow in the dark resin!
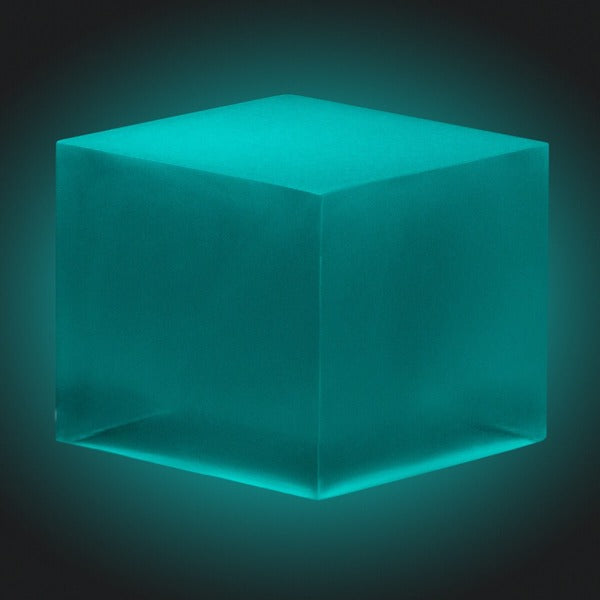
Epoxy resin is a thermosetting polymer that comes in two separate components. When these components are mixed together, the epoxy hardens into a rock-solid plastic. If blended and applied properly, the resulting plastic will feature a glasslike, crystal-clear finish that is fully transparent.
A coating of unmodified epoxy is the typical choice for common projects such as epoxy bar tops and table tops—but it doesn't have to be! There are many ways to dramatically change and customize the epoxy. By changing certain elements of the epoxy resin during mixing or prior to curing, you can produce many effects.
Alluring, elegant, eye-catching, peculiar—any or all of these traits are achievable through the application of embedments and suitable colorants. This is possible because—as it turns out—epoxy resin is highly receptive to certain types of colorants, which are usually classified as epoxy pigments and resin dyes.
In this article, we'll be talking about epoxy pigments; specifically, we'll be explaining how to use Glow-in-the-Dark Epoxy Pigments to make glow in the dark resin.
What are epoxy pigments?
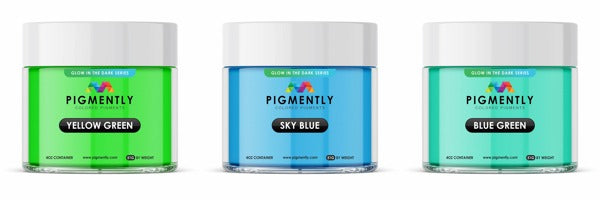
Epoxy pigments are dry, powder-based colorants that can imbue epoxy with colorful multi-toned textures. These pigments can be found in many different shades and textures, allowing you to greatly customize the look of your epoxy resin.
These pigments are often—but not always—made of mica powder. Mica powder is what you get when you grind up mica minerals, which are colorful and reflective, making them perfect for creating vibrant pigments. They're also non-soluble, so they retain these distinct properties when applied to a liquid substance, such as water, wax—and epoxy resin, of course!
You can browse the full range of pigments in our store on the Epoxy Pigment Collection page.
Epoxy pigments are a great way to achieve something more unique and less conventional. They can provide intense color, impart subtle tones, or produce interesting visual textures, depending on the pigments you've selected and the amounts you mix into your resin.
Speaking of unconventional, what better way is there to exhibit that than by making glow in the dark resin?
How to make glow in the dark resin
Glow in the dark resin is surprisingly easy to create. The most important step of the process is the epoxy mixing phase, where you'll not only blend up a resin batch much like normal, but also add in your glowing epoxy pigment partway through.
Below is our step-by-step guide to making glow in the dark resin.
Step #1: Gather your supplies.
The first thing you should do is ensure you have the necessary tools and supplies. You can use our Tools & Supplies Beginner's Guide to determine what you need.
For optimal results, you'll want to use a premium epoxy, such as our UltraClear Table Top Epoxy. For large projects, you can measuring your project substrate and use our Epoxy Calculator to figure the total volume of resin you should obtain.
Finally, to make your glow in the dark resin, you'll need a suitable pigment. Take a look at the Glow in the Dark Collection in our store to see your options.

Step #2: Prepare your project area.
Make sure your project space is clean and organized. Put the tools and supplies you'll be using in convenient locations where you're not likely to bump or spill anything.
We highly recommend you wear some protective gear, such as nitrile gloves and an N95 respirator. This will help keep you safe from potential fumes or skin irritation caused by the epoxy you've chosen.
Step #3: Measure and mix up a batch of glow in the dark resin.
You'll start by measuring out both components (resin and hardener) of your chosen epoxy. Measure by volume, not weight, and be sure to follow the appropriate ratio for you chosen epoxy brand.
For instance, UltraClear Table Top Epoxy uses a 1:1 ratio for mixing.
Once you've done that, mix your epoxy resin batch thoroughly. Follow the instructions for your resin.
Partway through the mixing, you can begin adding the glow in the dark resin pigment. Start with a small amount and add more until you're satisfied with how it looks.
Note: If you'll be pouring a thin layer onto a light-colored surface, you may want to add a little extra pigment powder. The epoxy may appear slightly darker in the mixing container than it will as a thin-layer finish on a light substrate.
Step #4: Apply your epoxy resin to your substrate or mold.
After you finish mixing up your batch, you'll have an adequate but limited amount of time to apply it.
Pouring resin onto a substrate is pretty straightforward. Just follow the instructions of your epoxy. We've also written a handy guide for pouring resin to get the best results.
Pouring resin into a silicone mold is similarly easy. Just be careful not to overfill it and stay close to the mold as you pour to reduce the amount of air bubbles you'll have to deal with.
Step #5: Remove air bubbles and let it cure.
The final phase of the epoxy process involves removing any air bubbles using a heat gun or torch, then allowing the epoxy resin to fully cure. Your instructions should explain how to do this, but if not, we've written a guide for that, too!
Learn how to remove air bubbles here.
When the air bubbles have been dealt with, it's time to let the resin cure. Ordinarily, this will take between 24 and 72 hours. We recommend giving it the full 72 hours to be sure.
As usual, consult your chosen epoxy resin's instructions for more detailed information.
When the epoxy has finished curing, it's ready to be used! For molded resin, simply remove it from the silicone mold, it should come out pretty easily.

Additional Resources
Now that you've gone through our step-by-step guide, here are some additional resources that you may find useful:
- Epoxy: Proper storage, shelf life, and preventing "yellowing" - Occasionally, you end up with more epoxy than you needed. Here's how to store excess epoxy to keep it fresh and prevent yellowing.
- How to wash away resin and epoxy on your hands and skin - Accidents happen sometimes. Check out our guide to washing resin off your skin.
- Cleaning and storing resin molds: A beginner friendly guide - Learn how to clean silicone molds after using them for an epoxy project.
Have questions? Want advice? Contact us!
When it comes to epoxy resin, UltraClear is committed to providing you with the best in customer service and support.
If you have any questions about making glow in the dark resin, or if you'd like advice on planning an epoxy project, please reach out to us. Our epoxy experts are ready to assist!
You can contact us via phone or email here. During business hours, you can also text chat online with one of our resin specialists by clicking the Help button at the bottom right of your screen.
And if you're ready to make glow in the dark resin of your own, come take a look at our Table Top Epoxy and the Glow in the Dark Series of epoxy pigments.


