Live-edge wooden projects are quickly becoming a staple in both modern and rustic interior design. The combination of their organic lines, raw edges, and natural charm offer a striking contrast to conventional furniture.
One of the driving forces behind the rise in DIY live-edge projects is the versatility and accessibility of epoxy resin—specifically, UltraClear Epoxy products. Whether you're a seasoned woodworker or a first-time DIYer, UltraClear Epoxy helps transform a slab of natural wood into a functional and stunning piece of art.
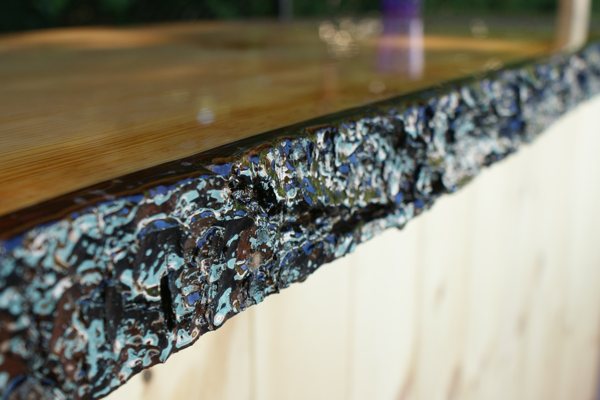
In this article, we'll explain the in's and out's of live-edge epoxy projects, while showcasing photos of live-edge creations shared with us by UltraClear Epoxy users.

What is Live-Edge Wood?
Live-edge wood maintains the original lines and contours of a tree, preserving the bark or the natural edge of the wood slab. This approach accentuates the organic aesthetic and highlights the unique grain patterns and textures that each piece of wood offers.
Epoxy is the perfect companion to live-edge wood. Its sealing capabilities protect the raw edges from damage while also allowing creators to fill gaps, knots, or voids, which enhances both structural integrity and visual appeal.
Common types of live-edge epoxy projects include table tops, river-style dining tables, coffee tables, desks, and wall art.

Styling Live-Edge Epoxy Furniture in Your Home
Incorporating live-edge epoxy furniture into your home décor allows you to bring nature indoors while also making a bold statement. These pieces, with their blend of organic contours and sleek epoxy finishes, act as natural conversation starters in any room.
For living rooms, a live-edge epoxy coffee table creates a warm, grounded centerpiece. In dining areas, a full-sized live-edge table top becomes a functional showpiece. Bedrooms benefit from unique live-edge headboards or benches, while offices or dens can gain a sense of character with a live-edge desk.
To personalize a live-edge piece to fit your décor, consider wood tones and epoxy colors that complement your space:
- Lighter woods like maple pair well with minimalist or Scandinavian designs, while darker woods such as walnut bring richness to traditional or industrial themes.
- If the wood's natural hue doesn’t match your palette, subtle epoxy pigments or accenting with décor items can harmonize the overall look.

A Quick DIY Guide to Live-Edge Epoxy Table Tops
Sourcing Your Live-Edge Table Top Slab
Before you begin the construction phase of your project, you'll want to have the right piece of live-edge wood. You can often find slabs at local lumber yards, woodworking supply stores, online retailers, or from specialized live-edge suppliers. When choosing a slab, look for:
-
Properly kiln-dried or air-dried wood to reduce moisture content
-
Minimal checking (cracks) or rot in the wood
-
A size and shape suitable for your table
-
Wood species that pairs well with epoxy (such as walnut, maple, or cherry)
Some suppliers even offer pre-flattened and sanded slabs, saving time and effort in your preparation process. You can even just find a completed live-edge table to use as your base—just be sure to strip any pre-existing finish before applying your epoxy to guarantee a strong, clear bond.

Supplies You’ll Need
-
UltraClear Bar & Table Top Epoxy (for a smooth final seal coat)
- (Optional) UltraClear Deep Pour Epoxy (if you need thicker layers between the slab edges)
-
Live-edge wood slab(s) or a pre-constructed live-edge table (with stripped finish)
-
A leveling table or adjustable saw horses
-
Plastic sheeting or melamine (for mold walls)
-
Silicone caulk
-
Mixing buckets
-
Stir sticks or drill mixer
-
Sandpaper (60 to 400+ grit)
-
A heat gun or torch
-
Nitrile gloves and protective eyewear
(Other optional items include powder pigments/dyes, or embedded objects like stones or shells, depending on your design.)


Setting Up Your Workspace
-
Work in a well-ventilated, dust-free environment with a stable temperature (ideally 70–75°F).
-
Make sure your surface is level and elevated for airflow.
-
Prepare all supplies before mixing epoxy, as the work time of each epoxy batch is limited.

Step #1: Flatten and Prep the Wood
Use a router sled or planer to flatten the wood if needed. Sand the surface smooth and clean it thoroughly to remove all dust and debris.
Step #2: Seal the Wood Edges
Using a paint brush of two or three inches, apply a thin seal coat of UltraClear Bar & Table Top Epoxy to all exposed wood surfaces. This seals the wood to prevent air bubbles during the deep pour.
Step #3: Build Your Mold
Line your mold with plastic or use melamine to build sides around the slab. Seal all corners and edges with silicone caulk to prevent leaks.
Step #4: Mix and Pour the Epoxy
Mix UltraClear Bar & Table Top Epoxy—or UltraClear Deep Pour Epoxy if you need a thick layer—according to package instructions. Pour the epoxy slowly into the center gap between slabs, if there is one, or around the slab’s edges. Use a heat gun or torch to eliminate surface bubbles.
Learn more about removing and preventing air bubbles here.
Step #5: Let It Cure
Allow the epoxy to cure for the recommended time. This can range from 24 to 72 hours depending on the depth of the pour, the type of epoxy, and ambient conditions.
See our guide to epoxy drying times for more information.
Step #6: Remove from Mold and Sand
Once cured, remove the piece from the mold. You can then sand it down using progressively finer grits to achieve a matte finish, if desired.
Step #7: Apply a Final Flood Coat if Needed
Pour a layer of UltraClear Bar & Table Top Epoxy over the entire surface to give it a crystal-clear, durable finish. Eliminate bubbles with a heat gun and let it fully cure.

The Problem with Budget Epoxies
In recent years, the epoxy market has been flooded with off-brand dealers selling budget-grade epoxies produced overseas. While it may be tempting to save money with low-cost epoxies, many of them come with significant drawbacks.
Budget-brand resins frequently lack the high quality control and testing rigor exemplified in U.S.-made products, with inconsistent formulations that can lead to issues like uneven curing, yellowing, excessive bubbling, or even toxic fumes during application.
In addition, many cheap epoxies contain unregulated additives that compromise both the structural strength and long-term durability of your project. For a piece that's meant to last for years—whether in your home or sold to a customer—the epoxy must be as dependable as the craftsmanship behind it.
Learn more about how to choose the right epoxy here.

Making the Right Choice with UltraClear Epoxy
UltraClear Epoxy products are manufactured in the U.S.A. under strict quality control standards, ensuring every batch performs reliably. But our goal is not merely to meet these requirements—it's to exceed them. To that end, we maintain high standards during the production of every batch.
With UltraClear Bar & Table Top Epoxy and UltraClear Deep Pour Epoxy, you can expect a crystal-clear finish that heavily resists surface abrasion, moisture, and heat damage.
UltraClear finishes are strong yet smooth, easy to clean, and require minimal maintenance. For hobbyists and professionals alike, the peace of mind in knowing you're using a premium, U.S.-made product is something that can't be replaced.

FAQs: Live-Edge Epoxy Projects
Question #1: Can I pour epoxy over bark or should it be removed first?
Bark should usually be removed. It often detaches over time and can contain air or moisture. Removing it ensures better epoxy adhesion and a longer-lasting finish.
Question #2: How do I prevent epoxy from leaking out of the form?
Seal all seams of your mold with silicone caulk and use a release agent like tape or wax. Make sure your mold material is non-stick and tightly secured.
Question #3: What's the difference between Deep Pour and Bar & Table Top Epoxy?
UltraClear Deep Pour Epoxy is designed for thick pours (up to 2 inches), ideal for river tables and large castings. UltraClear Bar & Table Top Epoxy is for thin, self-leveling coats up to 1/8 inch thick, perfect as a final top coat.
All UltraClear Epoxy products can be seamlessly layered to produce a thicker finish.
Question #4: Can I tint or color the epoxy?
Yes! Colorants are often added to epoxy, especially when crafting river tables. Use mica powders, alcohol inks, or epoxy-safe liquid pigments. Make sure additives are thoroughly mixed to avoid color streaks or clouding.
Learn more about adding color to your epoxy here.
Question #5: How do I fix surface imperfections like dimples or fisheyes?
Lightly sand the flawed area and clean it with isopropyl alcohol. Then apply another thin layer of UltraClear Bar & Table Top Epoxy to restore a smooth surface.

Have Questions? Want Advice? We're Here to Help!
If you have any questions about live-edge epoxy projects, or if you'd like assistance in planning an epoxy project, please reach out to us at UltraClear Epoxy—our epoxy experts are ready to assist!
You can contact us via phone or email here. During business hours, you can also text chat online with one of our resin specialists by clicking the Help button at the bottom of your screen.
In our online store, you'll find a variety of useful tools and supplies, ideal for resin projects, plus our award-winning UltraClear Bar & Table Top Epoxy and our UltraClear Deep Pour Epoxy.


