Epoxy is one of the few finishes that can offer both stunning beauty and exceptional durability. When applied correctly, it creates a crystal-clear, glass-like surface that protects against scratches, spills, and everyday wear. This unique combination of form and function makes epoxy the finish of choice for everything from elegant river tables to durable bar tops.
But the truth is, these results only come from using a high-grade resin. Lower-quality epoxy may look fine at first but can quickly degrade, leaving you with a project that loses its appeal and strength far sooner than it should.
In this guide, we’ll break down what epoxy really is, why the quality of your resin makes all the difference, and how to approach your first DIY epoxy project with confidence.
Contents(Click any link to jump to that section) |
|
Planning Your First DIY Epoxy Project Safety Precautions When Working With Epoxy Choosing the Right Colorants and Cosmetic Additives |

What Epoxy Actually Is
At its core, epoxy is a two-part polymer system—resin and hardener—that chemically reacts to form a rigid, durable plastic once cured. When mixed properly, the reaction is exothermic, generating heat as the molecules link together in long, cross-linked chains. The result is a hardened surface that bonds strongly to its substrate.
As a sealant and finish, epoxy offers several standout qualities:
-
Exceptional Clarity – High-quality epoxy cures to a glass-like surface that enhances the natural beauty of the material beneath it.
-
Strong Adhesion – Epoxy bonds securely to wood, concrete, stone, metal, and more.
-
Impact Resistance – A good epoxy features superb durability and can withstand drops, knocks, and heavy daily use with ease.
-
Chemical Resistance – Its waterproof surface repels stains from oils, solvents, and other household contaminants.
Because of these properties, epoxy isn’t just a protective coating—it’s an enhancement that can elevate both the look and durability of a project.

Why Quality Matters
Not all epoxies are created equal. While it might be tempting to save money on a budget-brand resin, the long-term results often tell a different story.
Common Failures of Low-Quality Epoxies
-
Premature Yellowing: A home bar top that looked perfect on day one can develop a deep amber hue after just a summer in a sunny room.
-
Soft or Tacky Surfaces: A table top may seem solid at first but later pick up dents from coffee mugs or remain sticky in warm weather.
-
Microbubbles & Clouding: That crystal-clear river table can end up with a hazy cast because trapped air never escaped.
-
Uneven Hardening: Inconsistent batches can cause one section of a project to cure rock-solid while another stays slightly rubbery.

The Issue with Imported Epoxies
Many bargain-priced epoxies are manufactured overseas in facilities that do not meet the same safety and quality standards enforced in the U.S. These products are often repackaged for American sale but may contain unstable chemical blends, unsafe additives, or improperly measured ingredients. The result is an unpredictable resin that can compromise your project’s appearance, longevity, and safety.
Read more about the importance of epoxy choice here.
UltraClear vs. Budget Epoxy
| Factor | UltraClear Epoxy | Typical Budget Epoxy |
|---|---|---|
| Clarity | Crystal-clear, glass-like finish with no haze. | Often dries with haze, microbubbles, or inconsistent transparency. |
| UV Resistance | Strong UV inhibitors protect against yellowing for years. | Minimal or no UV protection; yellowing may start within months. |
| Hardness & Durability | Cures to a hard, scratch-resistant, impact-tough surface. | Softer cure prone to dents, scratches, and imprint marks. |
| Curing Consistency | Uniform curing from edge to edge; consistent batch quality. | Can cure unevenly—some spots rock-hard, others tacky or rubbery. |
| Safety & Purity | 100% made in the USA, produced under strict safety standards. | May contain unsafe additives or untested chemicals from overseas production. |
| Working Time & Ease of Use | Predictable working time, smooth viscosity for easy application. | Inconsistent viscosity; working time can vary unexpectedly. |
| Longevity of Finish | Maintains gloss, clarity, and protection for decades with care. | Finish may degrade, yellow, or lose gloss much sooner. |
Why it matters:
Choosing UltraClear Epoxy isn’t just about looks—it’s about protecting the time, materials, and effort you invest in your project. The right resin ensures your work stays as beautiful and durable years from now as it is on day one.

The UltraClear Standard
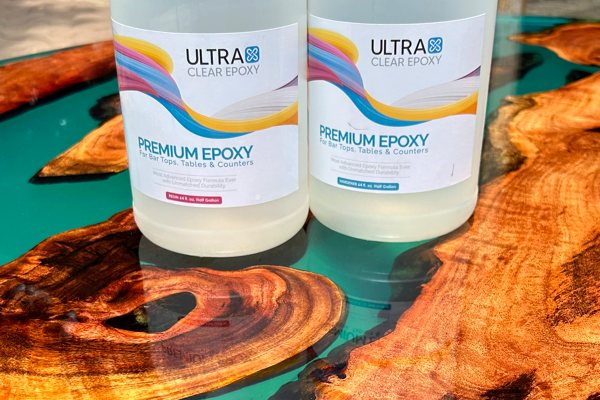
Every UltraClear Epoxy product—UltraClear Bar & Table Top Epoxy, UltraClear Deep Pour Epoxy, and UltraClear Art & Craft Epoxy—is manufactured 100% in the USA. Production is done under strict quality control, with every batch tested for clarity, hardness, UV resistance, and safety.
This consistency ensures your project cures beautifully every time, without surprise yellowing, soft spots, or other failures. Choosing UltraClear means your work stays as stunning years later as it was the day you finished it.

Planning Your First DIY Epoxy Project
Starting an epoxy project without a clear plan is like baking without a recipe—you might end up with something, but it’s unlikely to match your vision. Thoughtful preparation is key to success, especially if this is your first time working with epoxy.
Here’s a step-by-step approach to guide you through the process:

#1: Define Your Project Goals
Begin by deciding exactly what you want to create and how the finished piece will be used. Consider factors such as:
-
Function: Is it a table top, a decorative tray, or jewelry? Daily use items benefit most from higher durability.
-
Size and Thickness: Determine the dimensions and how thick the epoxy layer will be. This influences the type of epoxy you choose and the amount you need.
-
Aesthetic: Will your project feature embedded objects, colored resin, or clear gloss? Planning design elements ahead helps with ordering supplies and scheduling pour stages.
#2: Choose the Right UltraClear Epoxy
UltraClear offers different epoxies tailored for specific applications:
-
UltraClear Bar & Table Top Epoxy: Designed for coating surfaces up to 1/4" thick. Ideal for table tops, bars, and countertops that require a smooth, durable finish.
-
UltraClear Deep Pour Epoxy: Engineered for thick pours up to 2" deep, perfect for river tables or casting. Allows you to build layers without overheating or excessive curing times.
-
UltraClear Art & Craft Epoxy: Suitable for smaller projects like jewelry, coasters, and decorative crafts, providing crystal-clear results at a smaller scale.
Matching your project’s thickness and type with the correct epoxy formula is essential for a successful cure and finish.

#3: Calculate the Amount of Resin Needed
Accurately estimating resin volume prevents shortages or waste. Consider using one of the resin calculators on our website. By inputting your project’s length, width, and desired thickness, you can obtain an estimate on how much epoxy you'll need.
You'll find them here:
- Resin Calculator for UltraClear Bar & Table Top Epoxy
- Resin Calculator for UltraClear Deep Pour Epoxy
Always order slightly more than the calculator suggests to account for spillover or absorption, but avoid mixing multiple batches mid-pour to maintain color and curing consistency.
And, of course, you can always contact us to speak with a resin expert about your project goals.

#4: Prepare Your Workspace and Environment
Epoxy cures best under controlled conditions:
-
Temperature: Maintain between 70°F and 80°F—ideally 85°F. Cooler temperatures slow curing; warmer temperatures accelerate it and may cause excessive heat buildup.
-
Humidity: High humidity can cause a cloudy or blush finish. Try to work on dry days or use a dehumidifier in your workspace. We recommend maintaining a humidity level below 60%.
-
Dust Control: A dust-free environment is critical. Wipe surfaces clean and consider covering your project with a dust tent after pouring.
-
Ventilation: Good airflow helps with fume dissipation but you should avoid drafts that can carry debris into your wet resin.
#5: Prepare Your Surface
A level, clean surface is the foundation for a flawless epoxy finish:
-
Use a spirit level or laser level to check flatness. Minor unevenness can cause pooling or run-off.
-
Sand the surface lightly to create texture for better adhesion, especially if working over existing finishes.
-
Clean thoroughly with isopropyl alcohol or a grease-cutting cleaner to remove oils, dust, or wax residues.
See our guide to proper leveling for techniques and tips.

#6: Mix and Pour with Care
-
Mix resin and hardener thoroughly but gently to avoid trapping air bubbles.
-
Stir for at least 3-5 minutes, scraping the sides and bottom of the mixing container.
-
Pour slowly and in thin layers if doing a multi-coat application. This helps control heat buildup and reduces bubbles.
-
Use a heat gun or small torch to gently remove surface bubbles immediately after pouring.
#7: Practice and Patience
If this is your first epoxy project, consider starting small—a coaster, a tray, or a test panel. This lets you practice mixing, pouring, and finishing techniques without risking a large or expensive piece.
Patience during curing is vital; resist the temptation to touch or move the project until it’s fully set.

Safety Precautions When Working With Epoxy
Working with epoxy resin is generally safe when you follow best practices, but there are important safety measures to keep in mind:
-
Wear Gloves: Epoxy can cause skin irritation or allergic reactions. Use nitrile gloves to avoid direct contact.
-
Ventilate the Workspace: Fumes from the curing process can be harmful if inhaled in large amounts. Work in a well-ventilated area or use a respirator rated for organic vapors.
-
Avoid Skin Contact: If epoxy gets on your skin, wash immediately with soap and water. Avoid solvents for skin cleaning, as they can worsen irritation.
-
Protect Your Eyes: Safety goggles are recommended, especially during mixing or pouring to avoid splashes.
-
Dispose of Waste Properly: Harden leftover epoxy before disposal; never pour liquid resin down drains or into the environment.
-
Store Safely: Keep epoxy components out of reach of children and pets, and store in a cool, dry place.
Following these precautions protects your health and ensures a safe, enjoyable crafting experience.

Choosing the Right Colorants and Cosmetic Additives
Many epoxy projects benefit from added color, depth, or texture. Selecting compatible pigments and additives is essential for preserving the clarity and durability of your epoxy finish.
-
Pigments & Dyes: Use colorants specifically designed for epoxy resin. These are formulated to mix evenly and resist fading. Avoid household dyes or paint, which can cause curing problems or cloudiness.
-
Metallic Powders: Mica powders and metallic pigments add shimmering effects that maintain brilliance under clear epoxy.
-
Additive Ratios: Keep colorants below 5% of the total resin volume to maintain proper curing. Excess pigment can soften the finish or cause bubbles. These colorants are typically very potent, so this concern is rarely an issue for resin users.
-
Mix Thoroughly: Blend colorants into the resin before adding hardener for consistent color and to reduce clumps. Just remember that the color will usually appear darker in the container than it will once spread across a substrate.
-
Test First: Always do a small test batch when trying a new colorant or additive to check appearance and cure behavior.
Using UltraClear Epoxy with high-quality powder pigments or resin dyes lets you customize your project’s look without sacrificing strength or clarity.

Frequently Asked Questions About Epoxy
Can I use epoxy outdoors?
Only if it’s a covered space and you’re using a UV-resistant epoxy like UltraClear Bar & Table Top Epoxy. Consistent sun exposure over time will still cause wear, so providing as much shade from direct sunlight as possible will keep your finish looking good as new for longer.
See our article on outdoor epoxy projects for more information.
How long does epoxy take to fully cure?
Most UltraClear epoxies reach 90% cure within 72 hours, at which point they are fully usable, but complete hardness usually takes about 7 days.
Learn more about curing in our guide here.
Can I pour epoxy over an old finish?
Yes, but the surface must be sanded and cleaned thoroughly to ensure adhesion. If done properly, the new coating will mesh seamlessly with the older one, renewing your finish for years to come.
Our guide to refreshing an epoxy coating has more details.
Do I need a seal coat before a flood coat?
For porous surfaces like wood, a seal coat is essential to prevent air bubbles from escaping during the main pour. We strongly recommend applying a seal coat to any porous substrate, especially wood.
Discover the differences between seal coats and flood coats, plus when and how to do them, here!

Have Questions? Want Advice? We're Here to Help!
If you have any questions about epoxy resin, or if you'd like assistance in planning an epoxy project, please reach out to us at UltraClear Epoxy—our epoxy experts are ready to assist!
You can contact us via phone or email here. During business hours, you can also text chat online with one of our resin specialists by clicking the Help button at the bottom of your screen.
In our online store, you'll find a variety of useful tools and supplies, ideal for resin projects, plus our award-winning UltraClear Bar & Table Top Epoxy and our UltraClear Deep Pour Epoxy.
UltraClear Epoxy—Trusted by over 1 Million+ Happy Customers


